Showing posts with label French Cuisine. Show all posts

Caramelized Sea Scallops - Thomas Keller


***If you haven't heard about a wonderful chef named, Thomas Keller, then you are missing out.  He is quite the chef and is classically trained in French cuisine.  Chef Keller has several famous and very successful restaurants, three of which include The French Laundry, Bouchon and Ad Hoc.


Now, if I am ever out in Yountville, CA, I definitely want to visit Ad Hoc.  It has such a unique concept, that I think is awesome.  The concept is best described on the official website:
"The idea for Ad Hoc was simple - 5 days a week we'd offer a 4 course family style menu that changed each day, accompanied by a small, accessible wine list in a casual setting reminiscent of home."

Sounds neat, doesn't it?  Last Christmas, Brad gave me a copy of Thomas Keller's Ad Hoc at Home cookbook.  This book quickly became one of my favorites....a staple in my kitchen!  You can see my collection of other recipes from the Ad Hoc cookbook right HERE on my blog.


A friend of ours that is currently in culinary school gave us some fresh sea scallops.  They were large and beautiful...and I had just the recipe!  I've had my eye on Chef Keller's recipe for Caramelized Sea Scallops since I got the cookbook.  It's a simple recipe, with an outstanding result.  These scallops came out beautifully...Perfectly cooked, moist, and very flavorful!


His suggestion of using a stainless steel pan instead of a non-stick pan is essential!!  You'll get a much pretty caramelization that way.


Bon Appetit!!***

Caramelized Sea Scallops
Source:  Thomas Keller's Ad Hoc at Home Cookbook
www.adhocrestaurant.com
Ingredients:
2 cups kosher salt, plus more to taste
2 cups hot water
8 cups cold water
12 large sea scallops (about 1 3/4 pounds), preferably dry-packed, tough side muscle removed from each one
About 2 tablespoons (1 ounce) Clarified Butter
1/2 lemon (optional)

Directions:
Line a small baking sheet with paper towels. Combine the 2 cups salt with the hot water in a large bowl, stirring to dissolve the salt. Add the cold water.

Add the scallops to the brine and let stand for 10 minutes (no longer, or the scallops may become too salty). Drain the scallops, rinse under cold water, and arrange in a single layer on the paper towels.

Heat the clarified butter in a large stainless steel frying pan over medium-high heat until it ripples and begins to smoke. (Although you may be tempted to use a nonstick pan, a stainless steel pan will produce a more beautiful caramelized exterior.) Sprinkle the scallops lightly with salt and add them to the pan, without crowding. (If necessary, cook the scallops in two pans or in 2 batches; if they touch, they will steam rather than caramelize.) Cook, without moving the scallops, until the bottoms are a rich golden brown, 3 to 3 1/2 minutes. Turn the scallops and caramelize the second side.

Transfer the scallops to a serving platter and serve with a squeeze of lemon juice on top, if desired.

  • Digg
  • Del.icio.us
  • StumbleUpon
  • Reddit
  • RSS

French Crepes with Pecan-Crusted Chicken & Sauteed Peaches


***What inspires you?  Maybe it's a perfect, sun-filled day on the beach with the sand between your toes.  Or, maybe it's your faith, time spent with your family or your friends.  All of these wonderful things inspire me, along with one other obvious choice - food.  Food brings families together after a long day at the office.  A bowl of my GrannyRene's Chicken & Dumplings recipe has the power to put a smile on my face and bring tears to my eyes all at the same time.  That was always her specialty.

Not only is food vital to our existence, but it can be a source of creativity and fun.  To me, an empty plate is my blank canvas.  It's hard to beat the feeling you get when you put a smile on someone's face with a delicious meal. 

Every once in a while, something will inspire me to think up a new and original recipe.  If you're a fan of the TV show The Next Food Network Star, you know that all of the contestants have a specific "point-of-view" (aka P.O.V.) for their cooking.  Their P.O.V. is what describes their food...Some examples might be:  cooking family style, meals on a budget, healthy latin food, gluten-free meals, etc.  In other words, what will the winner's TV show be all about?  Just for fun, I started wondering what my P.O.V. would be.  The answer came to me several months ago, and I've had fun thinking up recipes since then. 

My concept would be the perfect reflection of my cooking:  It would be a fusion of classic Southern dishes and French cuisine....recipes that combine the two cultures to create new and exciting foods (You know, think about a southern belle's take on french food!)....Let's call it Southern-French fusion.  This recipe for "French Crepes with Pecan-Crusted Chicken & Sauteed Peaches" certainly falls under that category.  This dish is my interpretation of the popular southern combination of "Fried Chicken & Waffles."  It could also be a different spin on "Chicken Georgia", which combines chicken with pecans and fresh peaches.

This dish came out even better than I had imagined.  The flavors were fresh, yet hearty at the same time.  The sweetness of the crepe paired perfectly with the savoriness of the pecan-crusted chicken.  The sauteed peaches added a delightful freshness and balance to the overall dish, and the baby spinach added a pop of color and crunch.  Each bite was filled with great textures and flavors...This is one I'm both excited and proud of.

Brad and I both fell in love with this recipe.  Brad described it as "exceptional," and said that it was worthy of any 5-star restaurant.  Now, he may be a littled biased, but you know that made me smile!  I think that this dish will also put a smile on your face!

Bon Appetit!***


French Crepes with Pecan-Crusted Chicken & Sauteed Peaches:
Ingredients:
2 egg whites
1/2 cup finely chopped pecans
1/2 cup panko bread crumbs
1 tsp. dried parsley
1/2 tsp. salt
1/4 tsp. freshly ground black pepper
2 boneless skinless chicken breasts, pounded to 1/4-inch thickness
1 small bag baby spinach
Sauteed peaches, recipe below
Crepes, recipe below


Directions:
Preheat oven to 375 degrees F.


In a shallow bowl, lightly beat the egg whites.


In a separate shallow bowl, combine the pecans, bread crumbs, parsley, salt and pepper. Dip each chicken breast in egg white, until completely coated. Dredge in pecan mixture, making sure that each chicken breast is completely coated.


In a large nonstick skillet, heat 2 tbsp. butter over medium-high heat. Add both chicken breasts, and cook for 3 to 4 minutes per side, or until golden brown. Place on a foil-lined baking sheet.  Bake for 20-25 minutes, or until chicken is thoroughly cooked through.


Let chicken stand for 10 minutes. Cut chicken into 1/4-inch thick slices.

***While the chicken is baking in the oven, go ahead and start making the peaches and crepes.


For the Sauteed Peaches:
Ingredients:
4 peaches, peeled and cut into small wedges
1/4 cup light brown sugar
4 tbsp butter or margarine
Juice of two large lemons


Directions:
In a small saucepan, melt the butter over low-medium heat.  Add the brown sugar and lemon juice; stir well.  Next, add the peach slices.  Stir until the peaches are completely coated with the sugar mixture.  Continue to simmer over low heat until the sauce begins to thicken and the peaches are perfectly tender, stirring often.

***Once the peaches are simmering over low heat, move on to the crepes.  Keep a close eye on the peaches, being careful not to let them over-cook.
For the Crepes:

***This recipe makes about 9 crepes, so you will probably have a few extras.  I used my extra crepes to make dessert - Nutella & Banana Crepes!  You can fill them with just about any of your favorite flavors...get creative!
Ingredients:
1 cup all-purpose flour
1 teaspoon white sugar
1/4 teaspoon salt
3 eggs
2 cups milk
2 tablespoons butter, melted


Directions:
In the bowl of a stand mixer with whisk attachment, beat eggs and milk together until combined.  Turn off mixer and add flour, sugar and salt all at once.  Beat until smooth; stir in melted butter.


Heat a 10" skillet over medium heat.  Once it is hot, spray thoroughly with Pam cooking spray.  Using a soup ladle, pour the batter into the skillet, using approximately 1/4 to 1/3 cup of batter for each crepe.  Tip and rotate the skillet to spread batter as thinly as possible. Brown on both sides and transfer to a plate. 
***You'll know when it's time to flip each crepe, when tiny bubbles start appearing on the top of the batter...just like when making pancakes!  The top of the crepe will begin to appear dry.  Once this happens, you know it's time to flip!  Also, if you try to flip the crepe too early, it will break and/or fall apart. Be patient...it may take a few practice crepes before you get the hang of it.  Don't give up...You'll be a crepe flipping master before you know it! 


To assemble:
Transfer the crepe to a plate and place about 4-6 large baby spinach leaves on one half of the crepe.  Top with the chicken and sauteed peaches.  Fold the other half of the crepe onto the chicken filling.  Place a few slices of the peaches on the top of the folded crepe and finish it off with a drizzle of the peach sauce from the pan.


Enjoy!

  • Digg
  • Del.icio.us
  • StumbleUpon
  • Reddit
  • RSS

Peach Clafoutis - Julia Child


***Now, you didn't really think that I would let Julia's birthday go by without sharing a new recipe by Julia with you, right?  I've been curious about what a classic French clafoutis (pronounced Kla-foo-TEE) tasted like for a while now.  They always looked beautiful in the photos that I saw, and I wondered if they tasted as good as they looked.  This dessert has a luxurious custardy filling and tastes perfectly french! 

I knew that if I was going to make a clafoutis, it would be a crime not to begin with Julia's recipe in Mastering the Art of French Cooking, Volume I.  The recipe sounded incredibly simple, which it ultimately was.

Traditionally, a clafoutis is made with cherries, so that is how Julia presents this recipe in her cookbook.  Being the southern girl that I am, I decided to substitute the cherries with the freshest, most gorgeous Clanton peaches.  They were superb!  Feel free to subsitute about 3 cups of any fruit that you like.  The only other addition that I made was the cardamom.  There's just something about cardamom in fruity, pastry-like desserts that I adore.  I've included my changes in purple, below.

I did make one big mistake, though...I was in such a hurry that I forgot to sprinkle the second 1/3 cup sugar over the fruit, before pouring the rest of the batter into the pan.  As a result, the finished dessert wasn't quite as sweet as it should be, however, I'm sure my hips will thank me for that mistake later!

Bon Appetit!***


Clafoutis
Source:  Mastering the Art of French Cooking, Vol. I; by Julia Child, Louisette Bertholle, and Simone Beck

serves 6-8


Ingredients:
1 1/4 cups milk
1/3 cup sugar
3 eggs
1 Tablespoon vanilla
1/8 teaspoon salt
1/2 cup flour
3 ripe peaches, sliced
1/3 cup sugar
1 tsp. ground cardamom
powdered sugar

Directions:
Pre-heat oven to 350 degrees F.

In a blender blend the milk, sugar, eggs, vanilla, cardamom, salt and flour. Pour a 1/4 inch layer of the batter in a buttered 7 or 8 cup lightly buttered fireproof baking dish. Place in the oven until a film of batter sets in the pan (about 2-3 minutes).

Remove from the heat and spread the peaches over the batter. Sprinkle on the 1/3 cup of sugar. Pour on the rest of the batter.

Bake at 350 degrees for about 45 minutes to an hour. The clafouti is done when puffed and brown and and a knife plunged in the center comes out clean. Sprinkle with powdered sugar, serve warm.

  • Digg
  • Del.icio.us
  • StumbleUpon
  • Reddit
  • RSS

Pecan Caramelized Brie - Easy & Incredible!

***WOW...I just made this a few minutes ago, and I couldn't wait to share this recipe with you. This appetizer is the perfect fusion of French and Southern cuisine...In fact, it makes me want to say "Bonjour, Ya'll!" Haha.

This time of year, I also like experimenting with new recipes that I might incorporate into our Thanksgiving dinner. Without a doubt, this will be the star appetizer on our table this year! It is incredibly easy...It only took me 10 minutes to throw together...and it makes a gorgeous presentation!

We recently visited a fabulous, family-owned restaurant named The Char in Beckley, West Virginia. That night when we were trying to figure out where to eat dinner, I came across their website and took a look at their menu. I immediately knew that I wanted to eat there when I saw "Pecan Caramelized Brie" on the appetizer menu. I was intrigued! Such a quick decision is rare, folks. Now, let me just explain something....As a libra, I am SUCH an in-decisive person...just ask Brad...LOL. I have trouble deciding everything...where to eat lunch each day, what to wear, what to make for dinner, I could go on and on.

The appetizer menu wasn't the only part that looked good...it ALL looked good! If you're ever in the area, I highly recommend making time to have a meal there.

Just like the Pasta Rosa that I had in New Orleans, I knew that I wanted to try and re-create the Brie once I got home. I found THIS recipe, which sounded really close to what we had. I did make a few changes...I left out both the cranberries and the hot sauce. The hot sauce just sounded too odd...I wasn't sure about that flavor combo. I also didn't have any cranberries on-hand, but there wasn't any in the version at The Char anyway.

This Brie was seriously like a Pecan Pie on top of a delectable round of cheese...YUM! The savory-ness of the cheese balances perfectly with the sweetness of the topping. I served it with crackers...it doesn't get much better than that!

Bon Appetit!***

Ingredients:
1/2 cup lightly packed brown sugar
1/4 cup corn syrup
1/4 cup unsalted butter
1/4 teaspoon baking soda
1/4 teaspoon salt
1-1/2 Cup pecan halves, roughly chopped
One 3-inch round, Brie cheese

Preparation:
Combine brown sugar, corn syrup and butter in a small, heavy-bottomed saucepan set over medium heat. Stir mixture until it comes to a boil. Boil gently, without stirring, for 1 minute.

Remove from heat and, shielding hands with oven mitts, quickly whisk in baking soda. Stir in salt and pecans until mixture begins to set, about 30 seconds.
Working quickly, mound warm nut mixture on top of Brie and let caramel cascade down sides of cheese.

  • Digg
  • Del.icio.us
  • StumbleUpon
  • Reddit
  • RSS

French Macarons - Très Magnifiques!!!

Vanilla Chai Macarons:


Mocha Macarons:


***The 2009 October Daring Bakers’ challenge was brought to us by Ami S. She chose macarons from Claudia Fleming’s The Last Course: The Desserts of Gramercy Tavern as the challenge recipe.

Wow...this has been a busy month! Between my birthday on October 7th, learning to speak French, and making several batches of macarons...it's been a fun few weeks!

Being the francophile that I am, I was absolutely thrilled to learn that the Daring Bakers were going to tackle the ever-elusive French Macaron this month...You might remember my earlier attempts to master macarons. The first time that I tried was very un-impressive...definitely nothing to write home about, haha. The SECOND ATTEMPT turned out much better! I was actually proud of those.
Pumpkin Spice Latte Macaron:

I've learned several little tricks that always come in handy and seem to result in better macarons:
1. Age your egg whites either at room temperature overnight, or in the fridge for 2-4 days. Simply put your egg whites in a small bowl and cover with plastic wrap...then pop into the fridge or on the counter.
2. A pinch of Cream of Tartar to the egg whites will help stabilize them.
3. For some reason, my macarons always rise higher and have better "feet" if I use a silicon baking mat. It must have something to do with the heat distribution. A silicon mat also prevents sticking.
4. If you're going to process your own almond flour, remember to add a few tablespoons of confectioner's sugar to the food processor before grinding the nuts. If you don't, you'll end up with almond butter!
5. I found that the method of heating the macarons in a 200 degree oven for a few minutes and then raising the heat to 375 degrees to actually bake them was great...I've never read or seen this method before. Some recipes say to leave the macarons on the countertop for 30 minutes - 1 hour....this creates a film on the cookies and helps create better feet. Letting the cookies sit in a 200 degree oven simulates this process.

As I mentioned above, I'm actually learning to speak French right now. I am so excited to continue to learn more and more about the language. I learned a good bit of French before we traveled to Paris back in February of this year, but I was even more in love with it after visiting the amazing city of Paris...J'adore Paris!

Brad gave me the entire Rosetta Stone French course - Levels 1, 2 and 3 for my birthday. Of course, I was thrilled! I'm finding Rosetta Stone to be a fantastic program...I've already learned so much, just in a few weeks.

All this macaron-makin' has me wanting to go back to Paris even more (if that's even possible...lol). There's nothing quite like the macarons from the masters themselves at Laduree and Pierre Herme in Paris. I really enjoyed trying all of the flavors (and there are TONS!) in the different bakeries.

Speaking of flavors, I've made 3 flavor combinations so far (I have one more up my sleeve that I'll be making soon!). My flavors include:
1. Mocha Macarons - Macaron shells flavored with the new VIA instant coffee from Starbucks, with a chocolate ganache filling. The VIA coffee was so perfect, because the coffee is ground to a find powder. I simply added the contents of one VIA package to the almond flour while processing the nuts. This ensures that the coffee is completely mixed with the almond flour and confectioner's sugar.

2. Pumpkin Spice Latte Macarons - Again, VIA coffee flavored macaron shells, with a pumpkin-cream cheese filling. For the filling, I used Tartelette's "Cream Cheese Pumpkin Filling" recipe, which can be found HERE.

3. Vanilla Chai Macarons - Macaron shells flavored with Vanilla Chai tea mix/powder, with a vanilla buttercream filling. For these macarons, I used THIS recipe from Cooks Illustrated for the macaron shells. I added about 1 tablespoon of Oregon Chai Vanilla Tea Latte Mix to the almond flour while processing. As you can see, the chai made the macaron shells a beautiful color!

My favorites were the Mocha and Vanilla Chai Macarons...they were all so scrumptiously delicious!

Bon Appetit!!!***

French Macarons
Actual baking time: 12 minutes total, plus a few minutes to get your oven from 200°F to 375°F.

Equipment required:
• Electric mixer, preferably a stand mixer with a whisk attachment
• Rubber spatula• Baking sheets
• Parchment paper or nonstick liners
• Pastry bag (can be disposable)
• Plain half-inch pastry bag tip
• Sifter or sieve
• If you don’t have a pastry bag and/or tips, you can use a Ziploc bag with the corner snipped off
• Oven
• Cooling rack
• Thin-bladed spatula for removing the macaroons from the baking sheets
• Food processor or nut grinder, if grinding your own nuts (ouch!)
Ingredients:
Confectioners’ (Icing) sugar: 2 ¼ cups (225 g, 8 oz.)
Almond flour: 2 cups (190 g, 6.7 oz.)
Granulated sugar: 2 tablespoons (25 g , .88 oz.)
Egg whites: 5 (Have at room temperature)

Directions:
1. Preheat the oven to 200°F (93°C). Combine the confectioners’ sugar and almond flour in a medium bowl. If grinding your own nuts, combine nuts and a cup of confectioners’ sugar in the bowl of a food processor and grind until nuts are very fine and powdery.

2. Beat the egg whites in the clean dry bowl of a stand mixer until they hold soft peaks. Slowly add the granulated sugar and beat until the mixture holds stiff peaks.

3. Sift a third of the almond flour mixture into the meringue and fold gently to combine. If you are planning on adding zest or other flavorings to the batter, now is the time. Sift in the remaining almond flour in two batches. Be gentle! Don’t overfold, but fully incorporate your ingredients.

4. Spoon the mixture into a pastry bag fitted with a plain half-inch tip (Ateco #806). You can also use a Ziploc bag with a corner cut off. It’s easiest to fill your bag if you stand it up in a tall glass and fold the top down before spooning in the batter.

5. Pipe one-inch-sized (2.5 cm) mounds of batter onto baking sheets lined with nonstick liners (or parchment paper).

6. Bake the macaroon for 5 minutes. Remove the pan from the oven and raise the temperature to 375°F (190°C). Once the oven is up to temperature, put the pans back in the oven and bake for an additional 7 to 8 minutes, or lightly colored.
7. Cool on a rack before filling.
Yield: 10 dozen. Ami's note: My yield was much smaller than this. I produced about two dozen filled macaroons.

  • Digg
  • Del.icio.us
  • StumbleUpon
  • Reddit
  • RSS

Gorgeous Vol-Au-Vents with Homemade Puff Pastry!

Vol-Au-Vents with Crab, Avocado, Tomato and Lime Salad


Vol-Au-Vents with Chocolate & Frangelico Flavored Whipped Cream + Fresh Strawberries

***The September 2009 Daring Bakers' challenge was hosted by Steph of A Whisk and a Spoon. She chose the French treat, Vols-au-Vent based on the Puff Pastry recipe by Michel Richard from the cookbook Baking With Julia by Dorie Greenspan. We were given the chance to select our own filling recipes this month, which I loved. I made both a sweet and savory version.

My fillings included (recipes are at the bottom of this post):
1. Crab, Avocado, Tomato and Lime Salad
2. Chocolate & Frangelico Flavored Whipped Cream with Fresh Strawberries & Blackberries

The Crab Salad was incredible. It had a wonderfully fresh flavor. The sweet version was equally delicious...especially with the addition of Frangelico. That just sent it over the top!

Homemade puff pastry is enough to make most people run for cover. It involves massive amounts of butter, arm muscles and patience. The dough has to be kept cold throughout the entire process of incorporating the butter and making the turns. If the directions aren't followed carefully, you'll end up with a buttery mess and flat pastries!

Because of all these little things, puff pastry is something that I've always just purchased at the grocery store...I know, I know...it's the easy way out, right? However, I have to admit...homemade puff pastry is SO incredibly delicious! Sure, it takes time and practice, but it's worth it. It's something that every home cook should try at least once!

I was shocked at the amount of butter in this recipe - a full pound! It was fun pounding the sticks of butter into one big block, though. Who needs a punching bag when you have a ton of butter to smash into oblivion?? The rolling & turning of the dough wasn't particularly hard...just be sure to keep the dough cold, putting it back into the fridge in between turns, if needed.

I wonder how many of my other fellow Daring Bakers sat in front of their ovens, watching anxiously to see if their pastries would rise. Yes folks, that was me....haha! I slid the baking sheet into the pre-heated oven and got ready for the show. I sat right in front of my oven, on the floor, with the oven light turned on. What followed was one heck of a show! After a few minutes, the puff pastry started to, well, puff! And puff up, they did! After they turned a golden brown, I pulled them out and waited while they cooled.

In the end, the results were nothing short of fantastic...Considering the amount of butter in this dish, I'm glad that this recipe isn't extremely easy, otherwise I would be making it all the time!

THANKS Steph for a fabulous challenge this month!!!***

Equipment:
-food processor (will make mixing dough easy, but I imagine this can be done by hand as well)
-rolling pin
-pastry brush
-metal bench scraper (optional, but recommended)
-plastic wrap
-baking sheet
-parchment paper
-silicone baking mat (optional, but recommended)
-set of round cutters (optional, but recommended)
-sharp chef’s knife
-fork
-oven
-cooling rack

Prep Times:
-about 4-5 hours to prepare the puff pastry dough (much of this time is inactive, while you wait for the dough to chill between turns…it can be stretched out over an even longer period of time if that better suits your schedule)
-about 1.5 hours to shape, chill and bake the vols-au-vent after your puff pastry dough is complete.

Forming and Baking the Vols-au-Vent
Yield: 1/3 of the puff pastry recipe below will yield about 8-10 1.5” vols-au-vent or 4 4” vols-au-vent
In addition to the equipment listed above, you will need:
-well-chilled puff pastry dough (recipe below)
-egg wash (1 egg or yolk beaten with a small amount of water
-your filling of choice.

Directions:
Line a baking sheet with parchment and set aside.

Using a knife or metal bench scraper, divided your chilled puff pastry dough into three equal pieces. Work with one piece of the dough, and leave the rest wrapped and chilled. (If you are looking to make more vols-au-vent than the yield stated above, you can roll and cut the remaining two pieces of dough as well…if not, then leave refrigerated for the time being or prepare it for longer-term freezer storage. See the “Tips” section below for more storage info.)
On a lightly floured surface, roll the piece of dough into a rectangle about 1/8 to 1/4-inch (3-6 mm) thick. Transfer it to the baking sheet and refrigerate for about 10 minutes before proceeding with the cutting.

(This assumes you will be using round cutters, but if you do not have them, it is possible to cut square vols-au-vents using a sharp chef’s knife.) For smaller, hors d'oeuvre sized vols-au-vent, use a 1.5” round cutter to cut out 8-10 circles. For larger sized vols-au-vent, fit for a main course or dessert, use a 4” cutter to cut out about 4 circles. Make clean, sharp cuts and try not to twist your cutters back and forth or drag your knife through the dough. Half of these rounds will be for the bases, and the other half will be for the sides. (Save any scrap by stacking—not wadding up—the pieces…they can be re-rolled and used if you need extra dough. If you do need to re-roll scrap to get enough disks, be sure to use any rounds cut from it for the bases, not the ring-shaped sides.)
Using a ¾-inch cutter for small vols-au-vent, or a 2- to 2.5-inch round cutter for large, cut centers from half of the rounds to make rings. These rings will become the sides of the vols-au-vent, while the solid disks will be the bottoms. You can either save the center cut-outs to bake off as little “caps” for you vols-au-vent, or put them in the scrap pile.
Ready for the oven...

Dock the solid bottom rounds with a fork (prick them lightly, making sure not to go all the way through the pastry) and lightly brush them with egg wash. Place the rings directly on top of the bottom rounds and very lightly press them to adhere. Brush the top rings lightly with egg wash, trying not to drip any down the sides (which may inhibit rise). If you are using the little “caps,” dock and egg wash them as well.

Refrigerate the assembled vols-au-vent on the lined baking sheet while you pre-heat the oven to 400ºF (200ºC). (You could also cover and refrigerate them for a few hours at this point.)
Once the oven is heated, remove the sheet from the refrigerator and place a silicon baking mat (preferred because of its weight) or another sheet of parchment over top of the shells. This will help them rise evenly. Bake the shells until they have risen and begin to brown, about 10-15 minutes depending on their size. Reduce the oven temperature to 350ºF (180ºC), and remove the silicon mat or parchment sheet from the top of the vols-au-vent. If the centers have risen up inside the vols-au-vent, you can gently press them down. Continue baking (with no sheet on top) until the layers are golden, about 15-20 minutes more. (If you are baking the center “caps” they will likely be finished well ahead of the shells, so keep an eye on them and remove them from the oven when browned).

Remove to a rack to cool. Cool to room temperature for cold fillings or to warm for hot fillings.
Fill and serve.
Check out all those flaky layers!

*For additional rise on the larger-sized vols-au-vents, you can stack one or two additional ring layers on top of each other (using egg wash to "glue"). This will give higher sides to larger vols-au-vents, but is not advisable for the smaller ones, whose bases may not be large enough to support the extra weight.
*Although they are at their best filled and eaten soon after baking, baked vols-au-vent shells can be stored airtight for a day.
*Shaped, unbaked vols-au-vent can be wrapped and frozen for up to a month (bake from frozen, egg-washing them first).

Michel Richard’s Puff Pastry Dough
From: Baking with Julia by Dorie Greenspan
Yield: 2-1/2 pounds dough

Steph’s note: This recipe makes more than you will need for the quantity of vols-au-vent stated above. While I encourage you to make the full recipe of puff pastry, as extra dough freezes well, you can halve it successfully if you’d rather not have much leftover.
There is a wonderful on-line video from the PBS show “Baking with Julia” that accompanies the book. In it, Michel Richard and Julia Child demonstrate making puff pastry dough (although they go on to use it in other applications). They do seem to give slightly different ingredient measurements verbally than the ones in the book…I listed the recipe as it appears printed in the book. http://video.pbs.org/video/1174110297/search/Pastry

Ingredients:
2-1/2 cups (12.2 oz/ 354 g) unbleached all-purpose flour
1-1/4 cups (5.0 oz/ 142 g) cake flour
1 tbsp. salt (you can cut this by half for a less salty dough or for sweet preparations)
1-1/4 cups (10 fl oz/ 300 ml) ice water
1 pound (16 oz/ 454 g) very cold unsalted butter
plus extra flour for dusting work surface

Mixing the Dough:
Check the capacity of your food processor before you start. If it cannot hold the full quantity of ingredients, make the dough into two batches and combine them.
Put the all-purpose flour, cake flour, and salt in the work bowl of a food processor fitted with a metal blade and pulse a couple of times just to mix. Add the water all at once, pulsing until the dough forms a ball on the blade. The dough will be very moist and pliable and will hold together when squeezed between your fingers. (Actually, it will feel like Play-Doh.)

Remove the dough from the machine, form it into a ball, with a small sharp knife, slash the top in a tic-tac-toe pattern. Wrap the dough in a damp towel and refrigerate for about 5 minutes.
Meanwhile, place the butter between 2 sheets of plastic wrap and beat it with a rolling pin until it flattens into a square that's about 1" thick. Take care that the butter remains cool and firm: if it has softened or become oily, chill it before continuing.
That's a lot of butter!!!
Incorporating the Butter:
Unwrap the dough and place it on a work surface dusted with all-purpose flour (A cool piece of marble is the ideal surface for puff pastry) with your rolling pin (preferably a French rolling pin without handles), press on the dough to flatten it and then roll it into a 10" square. Keep the top and bottom of the dough well floured to prevent sticking and lift the dough and move it around frequently. Starting from the center of the square, roll out over each corner to create a thick center pad with "ears," or flaps.

Place the cold butter in the middle of the dough and fold the ears over the butter, stretching them as needed so that they overlap slightly and encase the butter completely. (If you have to stretch the dough, stretch it from all over; don't just pull the ends) you should now have a package that is 8" square.

To make great puff pastry, it is important to keep the dough cold at all times. There are specified times for chilling the dough, but if your room is warm, or you work slowly, or you find that for no particular reason the butter starts to ooze out of the pastry, cover the dough with plastic wrap and refrigerate it . You can stop at any point in the process and continue at your convenience or when the dough is properly chilled.

Making the Turns:
Gently but firmly press the rolling pin against the top and bottom edges of the square (this will help keep it square). Then, keeping the work surface and the top of the dough well floured to prevent sticking, roll the dough into a rectangle that is three times as long as the square you started with, about 24" (don't worry about the width of the rectangle: if you get the 24", everything else will work itself out.) With this first roll, it is particularly important that the butter be rolled evenly along the length and width of the rectangle; check when you start rolling that the butter is moving along well, and roll a bit harder or more evenly, if necessary, to get a smooth, even dough-butter sandwich (use your arm-strength!).

With a pastry brush, brush off the excess flour from the top of the dough, and fold the rectangle up from the bottom and down from the top in thirds, like a business letter, brushing off the excess flour. You have completed one turn.
Rotate the dough so that the closed fold is to your left, like the spine of a book. Repeat the rolling and folding process, rolling the dough to a length of 24" and then folding it in thirds. This is the second turn.

Chilling the Dough:
If the dough is still cool and no butter is oozing out, you can give the dough another two turns now. If the condition of the dough is iffy, wrap it in plastic wrap and refrigerate it for at least 30 minutes. Each time you refrigerate the dough, mark the number of turns you've completed by indenting the dough with your fingertips. It is best to refrigerate the dough for 30 to 60 minutes between each set of two turns.

The total number of turns needed is six. If you prefer, you can give the dough just four turns now, chill it overnight, and do the last two turns the next day. Puff pastry is extremely flexible in this regard. However, no matter how you arrange your schedule, you should plan to chill the dough for at least an hour before cutting or shaping it.
Steph’s extra tips:
-While this is not included in the original recipe we are using (and I did not do this in my own trials), many puff pastry recipes use a teaspoon or two of white vinegar or lemon juice, added to the ice water, in the détrempe dough. This adds acidity, which relaxes the gluten in the dough by breaking down the proteins, making rolling easier. You are welcome to try this if you wish.
-Keep things cool by using the refrigerator as your friend! If you see any butter starting to leak through the dough during the turning process, rub a little flour on the exposed dough and chill straight away. Although you should certainly chill the dough for 30 to 60 minutes between each set of two turns, if you feel the dough getting to soft or hard to work with at any point, pop in the fridge for a rest.
-Not to sound contradictory, but if you chill your paton longer than the recommended time between turns, the butter can firm up too much. If this seems to be the case, I advise letting it sit at room temperature for 5-10 minutes to give it a chance to soften before proceeding to roll. You don't want the hard butter to separate into chuncks or break through the dough...you want it to roll evenly, in a continuous layer.
-Roll the puff pastry gently but firmly, and don’t roll your pin over the edges, which will prevent them from rising properly. Don't roll your puff thinner than about about 1/8 to 1/4-inch (3-6 mm) thick, or you will not get the rise you are looking for.
-Try to keep “neat” edges and corners during the rolling and turning process, so the layers are properly aligned. Give the edges of the paton a scooch with your rolling pin or a bench scraper to keep straight edges and 90-degree corners.
-Brush off excess flour before turning dough and after rolling.
-Make clean cuts. Don’t drag your knife through the puff or twist your cutters too much, which can inhibit rise.
-When egg washing puff pastry, try not to let extra egg wash drip down the cut edges, which can also inhibit rise.
-Extra puff pastry dough freezes beautifully. It’s best to roll it into a sheet about 1/8 to 1/4-inch thick (similar to store-bought puff) and freeze firm on a lined baking sheet. Then you can easily wrap the sheet in plastic, then foil (and if you have a sealable plastic bag big enough, place the wrapped dough inside) and return to the freezer for up to a few months. Defrost in the refrigerator when ready to use.
-You can also freeze well-wrapped, unbaked cut and shaped puff pastry (i.e., unbaked vols-au-vent shells). Bake from frozen, without thawing first.
-Homemade puff pastry is precious stuff, so save any clean scraps. Stack or overlap them, rather than balling them up, to help keep the integrity of the layers. Then give them a singe “turn” and gently re-roll. Scrap puff can be used for applications where a super-high rise is not necessary (such as palmiers, cheese straws, napoleons, or even the bottom bases for your vols-au-vent).


Crab Salad w/Lime, Tomato and Avocado
Ingredients:
5 tablespoons fresh lime juice
2 1/2 tablespoons extra-virgin olive oil
2 1/2 tablespoons vegetable oil
1 tablespoon very finely chopped jalapeño
1 tablespoon chopped cilantro, plus cilantro leaves for garnish
1/2 tablespoon honey
1/2 teaspoon minced garlic
Salt and freshly ground black pepper
1/2 pound lump crabmeat, picked over
1 1/2 Hass avocados, diced ( 1/2 inch)
1/3 cup minced red onion
1 large heirloom tomato, cut into four 1/2-inch-thick slices
Tortilla chips, for serving

Directions:
In a small bowl, combine the lime juice with the olive oil, vegetable oil, jalapeño, chopped cilantro, honey and garlic. Season the dressing with salt and pepper.

In a small bowl, toss the crab with 3 tablespoons of the dressing and season with salt and pepper. In a medium bowl, gently toss the avocado with the red onion and 2 tablespoons of the dressing; season with salt and pepper.

Place a tomato slice on each plate and season with salt. Top with the avocado and the crab and garnish with the cilantro. Drizzle the remaining dressing on top and serve with tortilla chips.

Source: foodandwine.com

Chocolate Whipped Cream
INGREDIENTS:
4 ounces bittersweet chocolate, chopped
1 cup whipping cream
2 tablespoons sugar
2 tablespoons Frangelico

PREPARATION:
Put chopped chocolate into a medium bowl. Pour cream into a small heavy saucepan; stir in sugar. Place over medium heat and bring to a boil. Pour boiling cream over chocolate; stir until smooth and chocolate is melted. Cover and refrigerate for 4 hours, until thoroughly chilled.

Transfer to a large bowl. Beat to spreading or filling consistency, or until it reaches soft peaks.

Add Frangelico and stir/beat until mixed thoroughly.Refrigerate for about 1 hour before using.

Makes about 1 1/2 cups. Keep in refrigerator for up to 2 days.

Source: about.com


  • Digg
  • Del.icio.us
  • StumbleUpon
  • Reddit
  • RSS

Swiss & Prosciutto Tartine

***What in the world is a tartine, you say? Well, a tartine is traditionally an open-faced, French sandwich. They can be topped with countless combinations of meats, cheeses, fruits, vegetables and herbs. I've wanted to make a tartine ever since we traveled to Paris back in February of this year. This particular meal reminded me of a wonderful lunch we had in Paris at a sandwich shop. I had a delicious sandwich served on a fresh baguette....Mmm....I can taste it now!

Yesterday, Brad and I were getting hungry and I was already busy working on the Daring Baker Challenge for this month (And no, I can't tell you what that challenge is until the 27th!) I didn't particularly want fast food...we were craving something scrumptious. Even more important, I wanted to make something easy! So, I peered into my fridge and pantry and realized that I could make a yummy tartine. I made THIS French Bread very recently, and I just so happened to have an extra baguette in the freezer. I popped the baguette into a 350 degree oven for a few minutes, and it was as good as new! As it turns out, French Baguettes can be frozed very successfully! I topped the baguette slices with some wonderful Swiss cheese that was waiting for its 15 minutes of fame in the fridge. A few slices of fresh Prosciutto turned out to be the perfect addition, and chopped parsley finished it off flawlessly.

This dish was beautiful and could easily be served as an hor d'oeuvre at a party, after cutting it into bite-sized pieces. The combination of flavors is so satisfying and delicious, that you'll want a second helping! This is definitely one of my new favorites!!!***

Ingredients:
1 French Baguette
4-5 slices Prosciutto di Parma, torn into pieces
A block of Swiss Cheese
2 Tbsp. fresh Parsley, chopped
Salt & Pepper, to taste
Extra Virgin Olive Oil
Directions:
Preheat oven to 350 degrees.

Slice baguette in half, lengthwise. Place slices on a baking sheet and lightly drizzle with olive oil.

Next, cut Swiss cheese into slices that are about 1/8 inch thick. Cover the baguette slices with the cheese. Top with Prosciutto di Parma. Drizzle lightly with the olive oil. Season with salt and pepper and then sprinkle with the parsley.

Place baking sheet on the middle rack and bake until the cheese is melted and the bread is lightly toasted.

Cut into 2 inch pieces and serve immediately.

Bon Appetit!

  • Digg
  • Del.icio.us
  • StumbleUpon
  • Reddit
  • RSS

Chicken Breasts with Mushrooms & Cream

***WARNING: If you make this dish, you may be tempted to lick the remaining sauce from the pan! The mushroom and cream sauce that smothers the chicken breasts in this recipe is so divine. I found this in Julia Child's Mastering the Art of French Cooking, Vol. I. She never fails to impress me (as you can probably tell from the numerous Julia recipes I've been blogging about lately!)

Just think...cream, mushrooms and butter...Mmm....sauces don't get much better than that, folks! It's creamy, luxurious and satisfying...all at the same time.

Furthermore, the way that the chicken breasts are prepared produces incredibly tender and moist chicken. Because I used my Le Creuset dutch oven, I did not follow Julia's suggestion of covering the chicken with a piece of buttered wax paper (gasp!). I simply covered the dutch oven with the heavy lid and popped it into the oven. The results were fantastic!

I served this chicken with asparagus...perfection! Brad and I both are looking forward to having this dish again!***


Supremes de Volaille aux Champignons
(Chicken Breasts with Mushroom and Cream)
Source: Mastering the Art of French Cooking, Vol. I by Julia Child, Louisette Bertholle and Simone Beck (Knopf, 1961)

Ingredients:
4 supremes (boneless, skinless chicken breasts)
1/2 teaspoon lemon juice
1/4 teaspoon salt
Big pinch white pepper
5 tablespoons butter
1 tablespoon minced shallot or green onion
1/4 pound diced or sliced fresh mushrooms
1/8 teaspoon salt

For the sauce:
1/4 cup white or brown stock or canned beef bouillon
1/4 cup port, Madeira or dry white vermouth
1 cup whipping cream
Salt and pepper
2 tablespoons freshly minced parsley

Directions:Preheat oven to 400 degrees.

Rub the chicken breasts with drops of lemon juice and sprinkle lightly with salt and pepper. Heat the butter in a heavy, oven-proof casserole, about 10 inches in diameter until it is foaming. Stir in the minced shallots or green onion and saute a moment without browning. Then stir in the mushrooms and saute lightly for a minute or two without browning. Sprinkle with salt.

Quickly roll the chicken in the butter mixture and lay a piece of buttered wax paper over them, cover casserole and place in hot oven. After 6 minutes, press top of chicken with your finger. If still soft, return to oven for a moment or two. When the meat is springy to the touch it is done. (Please Note: Although Julia suggests to check the chicken after only 6 minutes, I (as well as several of my readers!) feel that this amount of time is inadequate to thoroughly cook the chicken. I cooked it for closer to 30-40 minutes. Please use a meat thermometer to ensure the correct temperature before serving!)

Remove the chicken to a warm platter (leave mushrooms in the pot) and cover while making the sauce (2 to 3 minutes).

To make sauce, pour the stock and wine in the casserole with the cooking butter and mushrooms. Boil down quickly over high heat until liquid is syrupy. Stir in the cream and boil down again over high heat until cream has thickened slightly. Off heat, taste for seasoning, and add drops of lemon juice to taste. Pour the sauce over the chicken, sprinkle with parsley and serve immediately.

Serves 4.

Source: “Mastering the Art of French Cooking, Vol. I” by Julia Child (Knopf, 1961)

  • Digg
  • Del.icio.us
  • StumbleUpon
  • Reddit
  • RSS

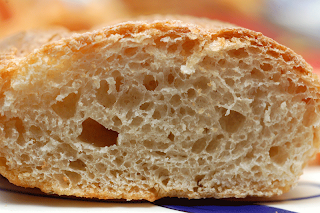
Julia Child's "Pain Francaise" (French Bread) - Revisited!


***I've decided something...there aren't many recipes or dishes in the world that are better than fresh bread right out of the oven. One of the only things that can make it better is if you've made it yourself. There's something oddly rewarding...and comforting at the same time...about all of the mixing, kneading and muscle that goes into making this bread. It can be hard to find a scrumptious loaf of authentic French bread here in the USA. That's where this recipe comes in.

Julia Child spent A LOT of time trying to come up with the perfect loaf. She writes in her memoir, My Life in France, that "it would eventually take us two years and something like 184 pounds of flour to try out all the home-style recipes for French bread we could find." Wow...one thing is for certain...Julia had patience!

She eventually traveled to Paris from Cambridge at the request of Professor Raymond Calvel...a wonderful baker and teacher at the Ecole Francaise de Meunerie. There, Professor Calvel taught Julia everything that she needed to know. Julia's husband, Paul, even took photos of the precise positions of the baker's hands during each step. She went back home to Cambridge, and immediately started putting Professor Calvel's techniques to good use. There were only a few problems she had to overcome - First, what type of flour could be used in the place of the French flour (which has a lower gluten content)? Second, how would she simulate a baker's oven?

She did overcome these obstacles and ended up with a superb recipe to include in Mastering the Art of French Cooking, Vol. II. Now, anyone can bake a beautiful French batard...with only a little patience and practice! Please don't let the length of this recipe scare you. The recipe itself is extremely simple...most of the recipe is technique and notes. If you're serious about baking French bread, I highly recommend purchasing a copy of MtAoFC, Vol. II....the illustrations helped me tremendously. The first time that I made this bread during THIS DARING BAKERS CHALLENGE, I only had the recipe to go by...not Julia's illustrations. I've made this bread several times already this month, and the results are much better than my first attempt.

Next time I make this bread...which will be pretty soon...I'll take more photos of the process and add them to this post!!***
Pain Francais (French Bread)
Source: Mastering the Art of French Cooking: Volume Two by Julia Child and Simone Beck

Recipe Quantity:
3 - baguettes (24” x 2”) or batards (16” x 3”) or
6 – short loaves, ficelles, 12 – 16” x 2” or
3 – round loaves, boules, 7 – 8” in diameter or
12 – round or oval rolls, petits pains or
1 – large round or oval loaf, pain de menage or miche; pain boulot

Recipe Time: 7 – 9 hours

Additional Information About the Recipe:
Flour: French bakers make plain French bread out of unbleached flour that has gluten strength of 8 to 9 per cent. Most American all-purpose flour is bleached and has slightly higher gluten content as well as being slightly finer in texture. It is easier to make bread with French flour than with American flour.
(Note: This was true when this book was written in the late 50s but today it is very easy to find unbleached AP flour. In addition, you can source French style, lower gluten AP flour from several specialty millers such as King Arthur Flour)

Bakers’ Oven Versus Home Ovens: Bakers’ ovens are so constructed that one slides the formed bread dough from a wooden panel right onto the hot, fire-brick oven floor, a steam injection system humidifies the oven for the first few minutes of baking. Steam allows the yeast to work a little longer in the dough and this, combined with the hot baking surface, produced an extra push of volume. In addition, steam coagulating the starch on the surface of the dough gives the crust its characteristic brown color. Although you can produce a good loaf of French bread without steam or a hot baking surface, you will a larger and handsomer loaf when you simulate professional conditions.

Stand Mixer Mixing and Kneading of French Bread Dough: French bread dough is too soft to work in the electric food processor, but the heavy-duty mixer with dough hook works perfectly. The double-hook attachment that comes with some hand held mixers and the hand-cranking bread pails are slower and less efficient, to our mind, than hand kneading. In any case, when you are using electricity, follow the steps in the recipe as outlined, including the rests; do not over-knead and for the heavy duty mixer, do not go over a moderate speed of number 3 or 4, or you risk breaking down the gluten in the dough.

Equipment Needed:
Unless you plan to go into the more elaborate simulation of a baker’s oven, you need no unusual equipment for the following recipe. Here are the requirements, some of which may sound odd but will explain themselves when you read the recipe.

(Note: you do not neet to buy all these items if you don't have them already. Just improvise with what you already have)
- 4 to 5 quart mixing bowl with fairly vertical rather than outward slanting sides
- a kneading surface of some sort, 1 1/2 to 2 square feet
- a rubber spatula or either a metal scraper or a stiff wide metal spatula
- 1 to 2 unwrinkled canvas pastry cloths or stiff linen towels upon which the dough may rise
- a stiff piece of cardboard or plywood 18 – 20 inches long and 6 – 8 inches wide, for unmolding dough from canvas to baking sheet
- finely ground cornmeal or pasta pulverized in an electric blender to sprinkle on unmolding board so as to prevent dough from sticking
- the largest baking sheet that will fit in your oven
- a razor blade or extremely sharp knife for slashing the top of the dough
- a soft pastry brush or fine spray atomizer for moistening dough before and during baking
a room thermometer to verify rising temperature

Making French Bread:
Step 1: The Dough Mixture – le fraisage (or frasage)
  • 1 cake (0.6 ounce) (20grams) fresh yeast or 1 package dry active yeast
  • 1/3 cup (75ml) warm water, not over 100 degrees F/38C in a glass measure
  • 3 1/2 cup (about 1 lb) (490 gr) all purpose flour, measured by scooping dry measure cups into flour and sweeping off excess
  • 2 1/4 tsp (12 gr) salt
  • 1 1/4 cups (280 - 300ml) tepid water @ 70 – 74 degrees/21 - 23C
Both Methods:
Stir the yeast in the 1/3 cup warm water and let liquefy completely while measuring flour into mixing bowl. When yeast has liquefied, pour it into the flour along with the salt and the rest of the water.

Hand Method:
Stir and cut the liquids into the flour with a rubber spatula, pressing firmly to form a dough and making sure that all the bits of flour and unmassed pieces are gathered in. Turn dough out onto kneading surface, scraping bowl clean. Dough will be soft and sticky.

Stand Mixer:
Using the dough hook attachment on the speed the mixer manufacturer recommends for dough hook use or the lowest setting if there is no recommendation, slowly work all the ingredients together until a dough ball is formed, stopping the mixer and scrapping the bits of flour and chunks of dough off the bottom of the bowl and pressing them into the dough ball. Continue to mix the dough on a low speed until all the bits of flour and loose chunks of dough have formed a solid dough ball.

(Depending the humidity and temperature of your kitchen and the type of AP flour your use, you may need to add additional flour or water to the dough. To decide if this is necessary, we recommend stopping during the mixing process and push at your dough ball. If the dough is super sticky, add additional flour one handful at a time until the dough is slightly sticky and tacky but not dry. If the dough is dry and feels hard, add 1 Tbsp of water a time until the dough is soft and slightly sticky. Breadchick likes to keep a soup or cereal bowl of flour and a 1 cup measure of water with a tablespoon next to her mixer for this.)

Both Methods:
Turn dough out onto kneading surface, scraping bowl clean. Dough will be soft and sticky. Let the dough rest for 2 – 3 minutes while you wash and dry the bowl (and the dough hook if using a stand mixer).

Step 2: Kneading – petrissage
The flour will have absorbed the liquid during this short rest, and the dough will have a little more cohesion for the kneading that is about to begin. Use one hand only for kneading and keep the other clean to hold a pastry scrapper, to dip out extra flour, to answer the telephone, and so forth. Your object in kneading is to render the dough perfectly smooth and to work it sufficiently so that all the gluten molecules are moistened and joined together into an interlocking web. You cannot see this happen, of course, but you can feel it because the dough will become elastic and will retract into shape when you push it out.

Hand Method:
Start kneading by lifting the near edge of the dough, using a pastry scraper or stiff wide spatula to help you if necessary, and flipping the dough over onto itself. Scrape dough off the surface and slap it down; lift edge and flip it over again, repeating the movement rapidly.

In 2 -3 minutes the dough should have enough body so that you can give it a quick forward push with the heel of your hand as you flip it over. Continue to knead rapidly and vigorously in this way. If the dough remains too sticky, knead in a sprinkling of flour. The whole kneading process will take 5 – 10 minutes, depending on how expert you become.

Shortly after this point, the dough should have developed enough elasticity so it draws back into shape when pushed, indicating the gluten molecules have united and are under tension like a thin web of rubber; the dough should also begin to clean itself off the kneading surface, although it will stick to your fingers if you hold a pinch of dough for more than a second or two.

Stand Mixer:
Place dough back into the bowl and using the dough hook attachment at the recommended speed (low), knead the dough for about 5 – 7 minutes. At about the 5 minute mark, stop the mixer and push at the dough with your fingertips. If it springs back quickly, you have kneaded the dough enough. If it doesn’t spring back continue to knead, stopping the mixer and retesting every 2 minutes. If the dough sticks to your fingers, toss a sprinkling of flour onto the dough and continue to knead. The dough should be light and springy when it is ready.

Breadchick also recommends always finishing with about 1 – 2 minutes of hand kneading just to get a good feel for how the gluten is formed.

Both Methods:
Let dough rest for 3 – 4 minutes. Knead by hand for a minute. The surface should now look smooth; the dough will be less sticky but will still remain soft. It is now ready for its first rise.

(From here out in the recipe, there is no difference for the hand vs. stand method)

Step 3: First Rising – pointage premier temps (3-5 hours at around 70 degrees)
You now have approximately 3 cups of dough that is to rise to 3 1/2 times its original volume, or to about 10 1/2 cups. Wash and fill the mixing bowl with 10 1/2 cups of tepid water (70 – 80 degrees) and make a mark to indicate that level on the outside of the bowl. Note, that the bowl should have fairly upright sides; if they are too outward slanting, the dough will have difficulty in rising. Pour out the water, dry the bowl, and place the dough in it

(Note: Very lightly grease the bowl with butter or kitchen spray as well to prevent the risen dough from sticking to the bowl).

Slip the bowl into a large plastic bag or cover with plastic, and top with a folded bath towel. Set on a wooden surface, marble or stone are too cold. Or on a folded towel or pillow, and let rise free from drafts anyplace where the temperature is around 70 degrees. If the room is too hot, set bowl in water and keep renewing water to maintain around 70 degrees. Dough should take at least 3 – 4 hours to rise to 10 1/2 cups. If temperature is lower than 70 degrees, it will simply take longer.

When fully risen, the dough will be humped into a slight dome, showing that the yeast is still active; it will be light and spongy when pressed. There will usually be some big bubbly blisters on the surface, and if you are using a glass bowl you will see bubbles through the glass.

Step 4: Deflating and Second Rising – rupture; pointage deuxieme temps (1 1/2 to 2 hours at around 70 degrees)
The dough is now ready to be deflated, which will release the yeast engendered gases and redistribute the yeast cells so that the dough will rise again and continue the fermentation process. With a rubber spatula, dislodge dough from inside of bowl and turn out onto a lightly floured surface, scraping bowl clean. If dough seems damp and sweaty, sprinkle with a tablespoon of flour.

Lightly flour the palms of your hands and flatten the dough firmly but not too roughly into a circle, deflating any gas bubbles by pinching them. Lift a corner of the near side and flip it down on the far side. Do the same with the left side, then the right side. Finally, lift the near side and tuck it just under the edge of the far side. The mass of dough will look like a rounded cushion.

Slip the sides of your hands under the dough and return it to the bowl. Cover and let rise again, this time to not quite triple, but again until it is dome shaped and light and spongy when touched.

(Note: You may need to lightly re-grease your bowl and plastic wrap for the second rise to prevent sticking)

Step 5: Cutting and resting dough before forming loaves
Loosen dough all around inside of bowl and turn out onto a lightly floured surface. Because of its two long rises, the dough will have much more body. If it seems damp and sweaty, sprinkle lightly with flour. Making clean, sure cuts with a large knife or a bench scraper, divide the dough into:
* 3 equal pieces for long loaves (baguettes or batards) or small round loaves (boules only)
* 5 – 6 equal pieces for long thin loaves (ficelles)
* 10 – 12 equal pieces for small oval rolls (petits pains, tire-bouchons) or small round rolls (petits pains, champignons)
* 2 equal pieces for medium round loaves (pain de menage or miche only)

If you making one large round loaf (pain de menage, miche, or pain boulot), you will not cut the dough at all and just need to follow the directions below.

After you have cut each piece, lift one end and flip it over onto the opposite end to fold the dough into two; place dough at far side of kneading surface. Cover loosely with a sheet of plastic and let rest for 5 minutes before forming. This relaxes the gluten enough for shaping but not long enough for dough to begin rising again.

While the dough is resting, prepare the rising surface; smooth the canvas or linen towelling on a large tray or baking sheet, and rub flour thoroughly into the entire surface of the cloth to prevent the dough from sticking

Step 6: Forming the loaves – la tourne; la mise en forme des patons
Because French bread stands free in the oven and is not baked in a pan, it has to be formed in such a way that the tension of the coagulated gluten cloak on the surface will hold the dough in shape.

For Long Loaves - The Batard:
(Baguettes are typically much too long for home ovens but the shaping method is the same)
After the 3 pieces of dough have rested 5 minutes, form one piece at a time, keeping the remaining ones covered. Working rapidly, turn the dough upside down on a lightly floured kneading surface and pat it firmly but not too roughly into an 8 to 10 inch oval with the lightly floured palms of your hands. Deflate any gas bubbles in the dough by pinching them.

Fold the dough in half lengthwise by bringing the far edge down over the near edge. Being sure that the working surface is always lightly floured so the dough will not stick and tear, which would break the lightly coagulated gluten cloak that is being formed, seal the edges of the dough together, your hands extended, thumbs out at right angles and touching.Roll the dough a quarter turn forward so the seal is on top.

Flatten the dough again into an oval with the palms of your hands. Press a trench along the central length of the oval with the side of one hand. Fold in half again lengthwise. This time seal the edges together with the heel of one hand, and roll the dough a quarter of a turn toward you so the seal is on the bottom.

Now, by rolling the dough back and forth with the palms of your hands, you will lengthen it into a sausage shape. Start in the middle, placing your right palm on the dough, and your left palm on top of your right hand. Roll the dough forward and backward rapidly, gradually sliding your hands towards the two ends as the dough lengthens. Deflate any gas blisters on the surface by pinching them. Repeat the rolling movement rapidly several times until the dough is 16 inches long, or whatever length will fit on your baking sheet.

During the extension rolls, keep circumference of dough as even as possible and try to start each roll with the sealed side of the dough down, twisting the rope of dough to straighten the line of seal as necessary. If seal disappears, as it sometimes does with all purpose flour, do not worry.

Place the shaped piece of dough, sealed side up, at one end of the flour rubbed canvas, leaving a free end of canvas 3 to 4 inches wide.The top will crust slightly as the dough rises; it is turned over for baking so the soft, smooth underside will be uppermost.

Pinch a ridge 2 1/2 to 3 inches high in the canvas to make a trough, and a place for the next piece. Cover dough with plastic while you are forming the rest of the loaves.After all the pieces of dough are in place, brace the two sides of the canvas with long rolling pins, baking sheets or books, if the dough seems very soft and wants to spread out. Cover the dough loosely with flour rubbed dish towel or canvas, and a sheet of plastic. Proceed immediately to the final rising, next step.

Step 7: Final Rise – l’appret - 1 1/2 to 2 1/2 hours at around 70 degrees
The covered dough is now to rise until almost triple in volume; look carefully at its pre-risen size so that you will be able to judge correctly. It will be light and swollen when risen, but will still feel a little springy when pressed.

It is important that the final rise take place where it is dry; if your kitchen is damp, hot, and steamy, let the bread rise in another room or dough will stick to the canvas and you will have difficulty getting it off and onto another baking sheet. It will turn into bread in the oven whatever happens, but you will have an easier time and a better loaf if you aim for ideal conditions.

Preheat oven to 450 degrees about 30 minutes before estimated baking time.

Step 8: Unmolding risen dough onto baking sheet – le demoulage.
(Note: we are only going to describe the unmolding of The Batard but the unmolding process is the same no matter the shape of your loaf or loaves. The key to unmolding without deflating your bread is slow and gentle!)
The 3 pieces of risen dough are now to be unmolded from the canvas and arranged upside down on the baking sheet. The reason for this reversal is that the present top of the dough has crusted over during its rise; the smooth, soft underside should be uppermost in the oven so that the dough can expand and allow the loaf its final puff of volume.

For the unmolding you will need a non-sticking intermediate surface such as a stiff piece of cardboard or plywood sprinkled with cornmeal or pulverized pasta.Remove rolling pins or braces. Place the long side of the board at one side of the dough; pull the edge of the canvas to flatten it; then raise and flip the dough softly upside down onto the board.Dough is now lying along one edge of the unmolding board: rest this edge on the right side of a lightly buttered baking sheet.

Gently dislodge dough onto baking sheet, keeping same side of the dough uppermost: this is the soft smooth side, which was underneath while dough rose on canvas. If necessary run sides of hands lightly down the length of the dough to straighten it. Unmold the next piece of dough the same way, placing it to the left of the first, leaving a 3 inch space. Unmold the final piece near the left side of the sheet.

Step 9: Slashing top of the dough – la coupe.
The top of each piece of dough is now to be slashed in several places. This opens the covering cloak of gluten and allows a bulge of dough underneath to swell up through the cuts during the first 10 minutes of baking, making decorative patterns in the crust. These are done with a blade that cuts almost horizontally into the dough to a depth of less than half an inch. Start the cut at the middle of the blade, drawing toward you in a swift clean sweep. This is not quite as easy as it sounds, and you will probably make ragged cuts at first; never mind, you will improve with practice.

Use an ordinary razor blade and slide one side of it into a cork for safety; or buy a barbers straight razor at a cutlery store. For a 16 to 18 inch loaf make 3 slashes. Note that those at the two ends go straight down the loaf but are slightly off centre, while the middle slash is at a slight angle between the two. Make the first cut at the far end, then the middle cut, and finally the third. Remember that the blade should lie almost parallel to the surface of the dough.

Step 10: Baking – about 25 minutes; oven preheated to 450 degrees (230 degrees C).
As soon as the dough has been slashed, moisten the surface either by painting with a soft brush dipped in cold water, or with a fine spray atomizer, and slide the baking sheet onto rack in upper third of preheated oven. Rapidly paint or spray dough with cold water after 3 minutes, again in 3 minutes, and a final time 3 minutes later. Moistening the dough at this point helps the crust to brown and allows the yeast action to continue in the dough a little longer. The bread should be done in about 25 minutes; the crust will be crisp, and the bread will make a hollow sound when thumped.If you want the crust to shine, paint lightly with a brush dipped in cold water as soon as you slide the baking sheet out of oven.

Step 11: Cooling – 2 to 3 hours.
Cool the bread on a rack or set it upright in a basket or large bowl so that air can circulate freely around each piece. Although bread is always exciting to eat fresh from the oven, it will have a much better taste when the inside is thoroughly cool and has composed itself.

Step 12: Storing French bread
Because it contains no fats or preservatives of any kind, French bread is at its best when eaten the day it is baked. It will keep for a day or two longer, wrapped airtight and refrigerated, but it will keep best if you freeze it – let the loaves cool first, then wrap airtight. To thaw, unwrap and place on a baking sheet in a cold oven; heat the oven to 400 degrees. In about 20 minutes the crust will be hot and crisp, and the bread thawed. The French, of course, never heat French bread except possibly on Monday, the baker’s holiday, when the bread is a day old.

Step 13: Canvas housekeeping
After each bread session, if you have used canvas, brush it thoroughly to remove all traces of flour and hang it out to dry before putting away. Otherwise the canvas could become mouldy and ruin your next batch of dough.

The Simulated Bakers’ Oven
Baking in the ordinary way, as described in the preceding recipe, produces an acceptable loaf of bread but does not nearly approach the glory you can achieve when you turn your home oven into a baker’s oven. Merely providing yourself with the proper amount of steam, if you can do nothing else, will vastly improve the crust, the color, the slash patterns, and the volume of your bread; steam is only a matter of plopping a heated brick or stone into a pan of water in the bottom of the oven.

The second provision is a hot surface upon which the naked dough can bake; this gives that added push of volume that improves both the appearance and the slash patterns. When you have the hot baking surface, you will then also need a paddle or board upon which you can transfer dough from canvas to hot baking surface. For the complete set-up, here is what you should have...and any building-supply store stocks these items:

For the hot baking surface: Metal will not do as a hot baking surface because it burns the bottom of the dough. The most practical and easily obtainable substance is ordinary red floor tiles 1/4” thick. They come in various sizes such as 6 x 6, 6 x 3, and you only need enough to line the surface of an oven rack. Look them up under Tiles in your Directory, and ask for “quarry tiles” their official name.

(Note: When this book was written, quarry tiles had a fair amount of asbestos in them. Today, in North America and Europe, they normally are made of clay. Make sure if you decide to go purchase some quarry tiles you only purchase unglazed quarry tiles because most of the glazes used contain lead or some other nasty substance that could get transferred. A large pizza stone will also work but make sure it is at least 1/4 inch thick because the thinner ones can break when used at the high heats that baking bread requires. Make sure you never put wet tiles in the oven because they can shatter or worse as the oven heats up.)

For unmolding the risen dough from its canvas: A piece of 3/16 inch plywood about 20 inches wide.

For sliding the dough onto the hot tiles: When you are doing 3 long loaves, you must slide them together onto the hot tiles; to do so you unmold them one at a time with one board and arrange them side by side on the second board, which takes place on the baker’s paddle, la pelle. Buy a piece of plywood slightly longer but 2 inches narrower than your oven rack.

(Note: Today, you can buy a real baker’s paddle easily online or at a restaurant supply store for about the same money as a piece of plywood and it will have a bevelled edge that will make sliding loaves in and out of the oven easier)

To prevent dough from sticking to unmolding and sliding boards: White cornmeal or small dried pasta pulverized in the electric blender until it is the consistency of table salt. This is called fleurage.

The steam contraption: Something that you can heat to sizzling hot on top of the stove and then slide into a pan of water in the oven to make a great burst of steam: a brick, a solid 10lb rock, piece of cast iron or other metal. A 9 x 12 inch roasting pan 2 inches deep to hold an inch of water and the hot brick.

  • Digg
  • Del.icio.us
  • StumbleUpon
  • Reddit
  • RSS