


This Valentine's Day chocoholic lover's cupcake is by Pleasantville, New York's Flour & Sun Bakery via Flickr - visit flourandsunbakery.com for daily flavors and custom ordering information.
chocoholic lovers cupcake: "Chocolate cake topped with chocolate buttercream, drizzled with chocolate ganache and topped with a brownie heart"
Bonus - more heart cupcakes!
Showing posts with label buttercream. Show all posts
Showing posts with label buttercream. Show all posts
Another brownie heart cupcake for the chocoholics


Read User's Comments0

Homemade Valentine's Day Funfetti Cupcakes
Valentine's Day is coming up and I've been stumped on what kind of cupcakes to make. I am definitely making my favorite red velvet cupcakes but that seemed a little too obvious.
Something with strawberries seemed like a good choice...but I'm completely repulsed by strawberries, I hate the smell and the taste, and since I wanted to eat a cupcake I had to re-think my idea.
I came to the conclusion to toss some Valentine's Day sprinkles into some vanilla cupcake batter and bake, top with a classic vanilla buttercream, and garnish with more heart sprinkles. You can read a little more about them and see more photos by clicking here or just skip below for the recipe.
Valentine's Funfetti Cupcakes
Adapted from Cakespy
Makes about 12 cupcakes
1 1/4 cups all purpose flour
1 1/2 teaspoon baking powder
1/4 teaspoon salt
6 tablespoon butter, room temperature
3/4 cup sugar
1 whole egg plus 1 egg white, room temperature
1 teaspoon vanilla extract (or seeds scraped from 1/2 vanilla bean)
1/2 cup milk, room temperature
Heaping 2 tablespoons valentine's sprinkles
Preheat oven to 350°F and line a cupcake pan with paper liners.
In a large bowl, sift flour, baking powder, and salt. Set aside. In a stand mixer, cream the sugar and butter until well combined, about 3-5 minutes. Add the egg and egg white, one at a time, beating on low until just incorporated.
Add vanilla. Gradually add flour mixture in three additions, alternating with milk in two additions, ending with the flour mixture. Fold in sprinkles.
Fill cupcake liners about 2/3 full. Bake for about 17-20 minutes or until a toothpick inserted in the center comes out clean. Remove from pan and cool completely on a wire rack before frosting.
Vanilla Buttercream
Adapted from My Baking Addiction
1 1/2 sticks unsalted butter, softened
Pinch of fine grain sea salt
1 1/2 teaspoons vanilla extract
3 3/4 cup confectioners' sugar, sifted
4-6 tablespoons heavy cream or milk
In a large mixing bowl, cream butter until fluffy. Slowly add confectioners' sugar and continue creaming until well blended.
Add salt, vanilla, and 3 tablespoons of heavy cream or milk. Blend on low speed until moistened. Add an additional 1 to 3 tablespoons of heavy cream or milk until you reach the desired consistency. Beat at high speed until frosting is smooth and fluffy.

CUP CAKES


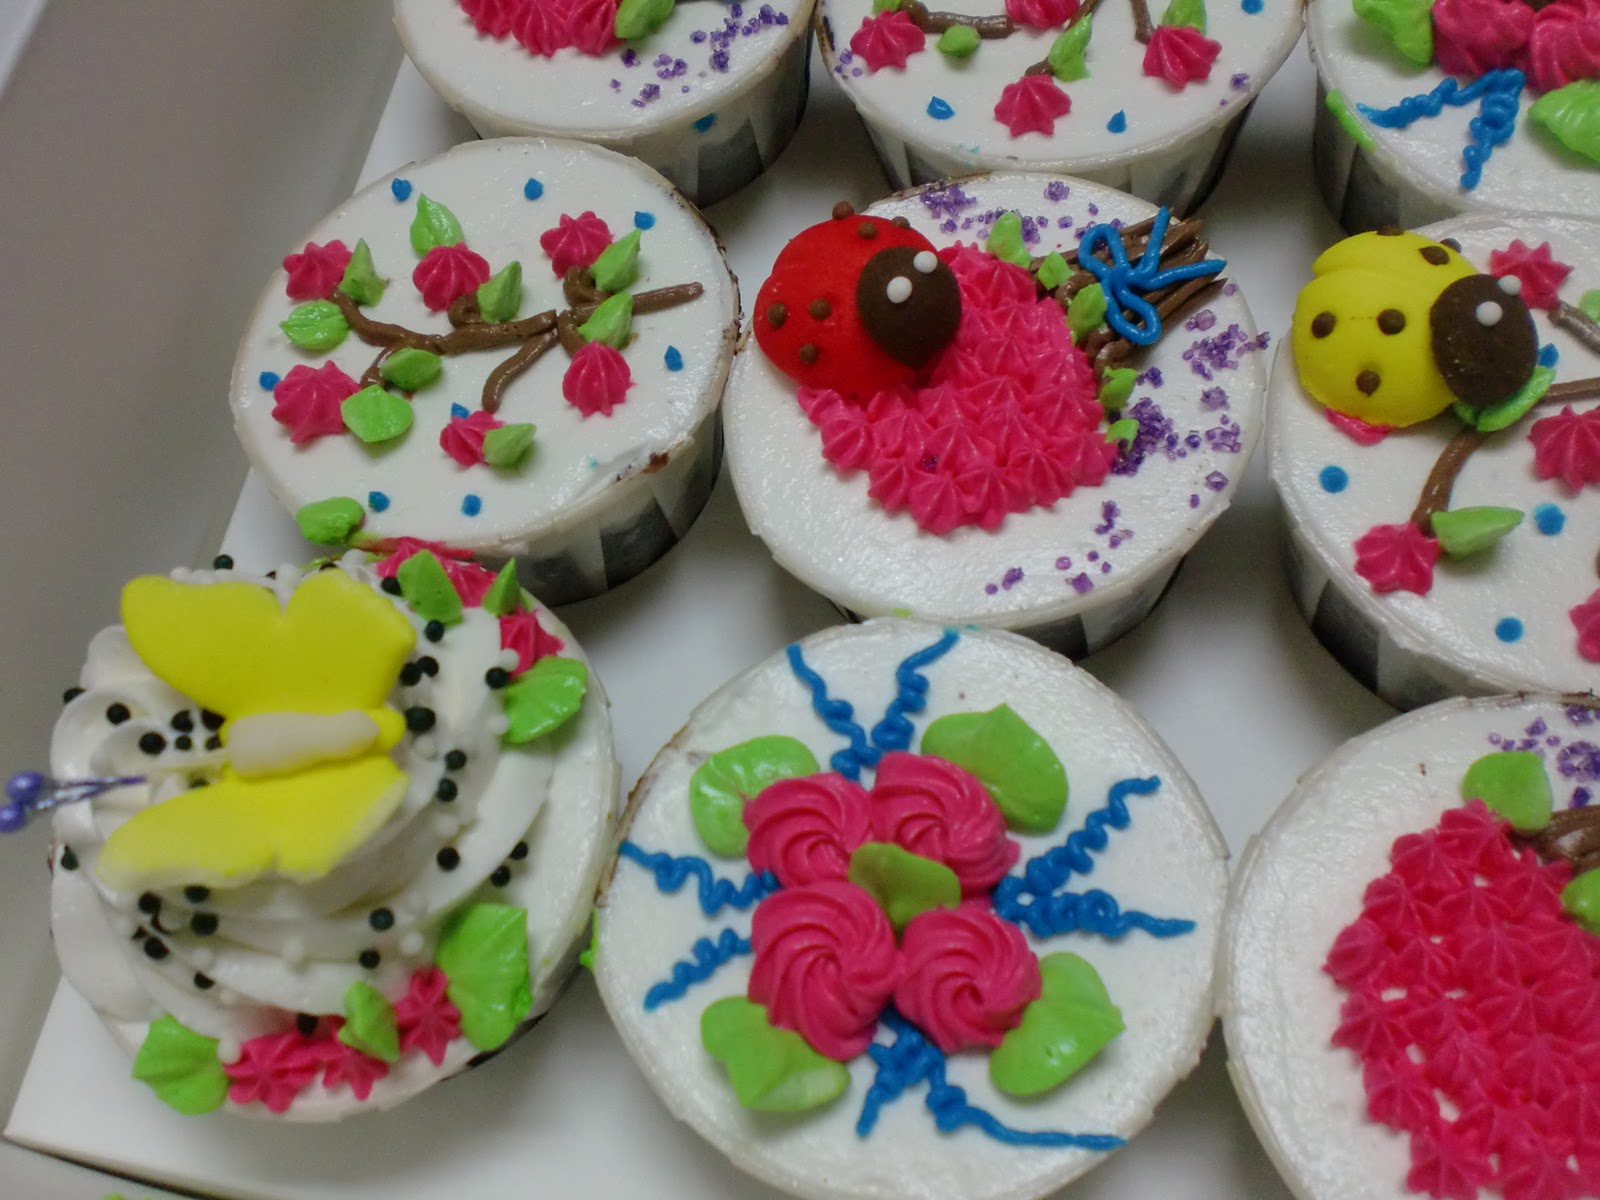

Repeat order dari Asp Zulkifli sebagai buah tangan untuk anak daranya tuk dibawa UUM Sintok,Kedah...
Terima kasih ya!!
Chattanooga Read House Swirly Wedding Cake

Helen from Humphrey's Flowers was on-site when I arrived with the cake and she got right to adding all those beautiful fresh flowers between each tier.
The fine folks from Sound Force Entertainment were also there, setting up a classy and cool "tent" area for the bride and groom to relax in during the reception. Some other DJs were there setting up the music for the event, it was like we were at a party! LOL!! I guess we were, duh!
I'm usually in and out before (or after) these vendors come and go, so it was nice to chat with them and enjoy the fruits of their craft. I guess we don't get out much!! LOL!! Have a great weekend!
Chattanooga Outdoor Camping Groom's Cake

Our couple here loved the great outdoors and were very specific that the cake include a black bear, a tent, a canoe, and some fallen tree logs.
This was a one of those cakes where I got the hubby involved, and as usual, he came up with some neat (unusual) ways of doing things. He made the rocks by tearing some hunks off some modeling chocolate that was still hard and had not yet been kneaded smooth. I was very surprised at how "rock-like" the crumbly modeling chocolate looked. He also made the hollow logs. He started with a piece of rolled brown modeling chocolate. He made some "bark" lines and then flipped it over. He then took a log of modeling chocolate (think big Tootsie Roll) and then rolled the thin bark piece around it, letting the thin bark hang over the tootsie log and ripped the ends to make it look jagged and natural. Again, I was impressed by my little hubby. I guess watching all those cake shows and keeping me company in the kitchen really paid off!!
Have a great week!
How Do I Get My Cakes Smooth? - A Buttercream Tutorial
Since the day I started doing cakes, I have always wanted my cakes to look perfect. I worked with many different icings and techniques to get them really close, but I always used fondant when I wanted a really smooth finish. Then I started doing cakes professionally and found out quickly that paying customers don't like the taste or the added expense of fondant. So I went back to the drawing board and I worked harder and got better with my butter cream skills. I thought I had finally achieved what everyone else knew.
And then I started blogging and when I began to gain some sort of readership, I started getting comments like "Is that buttercream or fondant?" and "How do you get your buttercream so smooth?". I was so flattered, and I even promised some of you that I would work on a buttercream tutorial. And I truly started writing one on several occasions, and it just seemed too hard to capture with words alone. If only technology provided some way of capturing video and audio in a format that could be played back!
So we cashed in some reward points for a little Sony HandyCam. And this past week I worked with my husband on my very first video cake tutorial. It was very scary and while I'm not entirely happy with the results, I do think the results were worthy enough to share with you, my community of cake blogging friends. I would appreciate it if you watched and gave me your feedback. I would love to know if your cakes get smoother as a result.
This technique works best with an all butter icing. Feel free to try it with your own recipe, but I am providing my "kids" butter cream recipe if you want to try it. It's a little on the sweet side, but I find it very workable!
Cup a Dee Cakes Kid's Buttercream Recipe
2 lbs unsalted butter, at room temperature
16 Cups powdered sugar (4 lbs)
1 TBL plus 1 tsp vanilla extract
1/2 tsp salt
1 Cup heavy cream OR light corn syrup (not nearly as good, but works)
In a stand mixer fitted with the paddle attachment add all butter, salt and vanilla to 5 Quart bowl and blend. Scrape down bowl. Add ½ of the powdered sugar in stages (put a clean dish towel over the mixer and bowl to keep sugar dust down). Add all of the whipping cream and blend. Scrape down bowl. Add the rest of the powdered sugar in stages until it is blended in. Scrape down bowl. Now whip the fool out of it on super high for about 5-10 minutes depending on the strength of your mixer. The icing will go much lighter in color, fluffier and a good spreading consistency.
Note: This icing is too thick and heavy to spread until you whip the daylight out of it. Don’t skimp on the final beating.
You can leave the icing out of the fridge for a few days, it will be fine. Re-whip it when it’s been sitting for the best results.
Icing will not be a bright white due to the color of the butter. Your can purchase some white food coloring to add to the final layer of icing if needed. Most people won’t notice that it’s not white and it will photograph better.
Variations
Peanut Butter: Add one 18 oz jar of reduced fat peanut butter for entire batch of icing
Mocha: Dilute 2 TBL of instant coffee granules in TBL hot water-then add to 2 lbs of icing
Chocolate: 4-6 oz melted chocolate per lb of icing (will be a light brown).
Strawberry or Raspberry: Add preserves.
Also, as an extra special bonus, here is the icing recipe that Mike McCarey gave us during his modeling chocolate class!
Mike's Buttercream Recipe
1 lb 4 oz powdered sugar
½ cup pasteurized egg whites
2 TBL vanilla
2 lbs (8 sticks) softened butter (unsalted)
In an electric mixer, combine sugar, egg whites and vanilla. Mix on low to combine. Increase speed to high and mix for 10 minutes to build volume. Reduce speed to medium, slowly add softened butter and beat an additional 10 minutes until full volume is reached.
Also, as an extra special bonus, here is the icing recipe that Mike McCarey gave us during his modeling chocolate class!
Mike's Buttercream Recipe
1 lb 4 oz powdered sugar
½ cup pasteurized egg whites
2 TBL vanilla
2 lbs (8 sticks) softened butter (unsalted)
In an electric mixer, combine sugar, egg whites and vanilla. Mix on low to combine. Increase speed to high and mix for 10 minutes to build volume. Reduce speed to medium, slowly add softened butter and beat an additional 10 minutes until full volume is reached.
Black Lace Wedding Cake with Wedge Separators

This was also my first wedge separator cake. I used styrofoam wedges for the separators. I ran my blow torch over r the surface of the styrofoam quickly and it really helped seal the surface. I still covered them with cake foil, but that little blast of heat really helped it from shedding or pilling. I then filled them with mini roses once on site.
I used plenty of dowels to make sure everything stayed together. I had to carry it up the sometimes harrowing Lookout Mountain to the Grandview and it traveled just fine!
4 Layer Birthday Cake

Whew, I am home! It feels like it has been a long time since I have been home baking and blogging. The past few weeks I have been to New York, Las Vegas, Las Angeles, Dallas, and back to Las Angeles! As of 1:00 am Dallas time today I am back in my own home and ready to blog. Don't get be wrong, my travels have been for work and I had a blast, I am one lucky girl to have a job where I get to go to such amazing places and do what I love.
Since I have been traveling up a storm my Beagle was fortunate enough to go to my good friends Tracy and Jeff's house. Taylor dog loves to visit them since it means she not only gets a ton of love but she also gets to play with their sweet lab Maya. As a thank you to them for taking such good care of my baby when Tracy came to me and asked if I could make a birthday cake for her brother I was so excited to help out.


After speaking with Tracy about what sort of cakes her brother liked I landed on a 4 layer classic yellow and chocolate cake with a layer of chocolate sauce and dark chocolate cream cheese icing. Pretty much a classic birthday cake elevated to the next level. You can make this cake with your own cake recipe from scratch or you can use Duncan Hines dark chocolate fudge cake mix and their classic yellow cake mix, just as amazing only a bit easier. I made this one using 8" cake pans which makes for a nice high manageable cake. You can make it as large or as small as you like.
Dark Chocolate Cream Cheese Icing: (Recipe from the lovely Miss Bakerella)
- 1/2 cup butter, softened to room temperature
- 8 oz. cream cheese, softened to room temperature
- 1/2 cup unsweetened cocoa powder ( I used Hershey’s Special Dark Cocoa)
- 1 box (1 lb) confectioner’s sugar
- 1 tsp vanilla
- 1-3 Tbsp milk
- Cream the butter and cream cheese with a mixer.
- Add the cocoa and vanilla.
- Add the confectioner’s sugar in small batches and blend on low until combined.
- Scrape down sides with each addition.
- Add 1 tablespoon of milk at a time until you get the consistency you desire
Chocolate sauce: (original recipe from the Smiths Family 12 layer cake)
- 3 cups sugar
- 1/2 cup unsweetened cocoa powder , preferably Dutch process
- 1 cup (2 sticks) unsalted butter , cut up
- 1 can (12 ounces) evaporated milk
- 1 tablespoon vanilla extract
- To make the sauce, bring the sugar, cocoa, butter and evaporated milk to a full boil in a large saucepan. Reduce the heat to medium-low and cook until the icing has thickened slightly (it will resemble chocolate syrup but will thicken as it cools), about 3 minutes.
- Stir in the vanilla.
- Let the icing cool until thick enough to spread, but still pourable.
To assemble cake:


- Place your first completely cooled layer of yellow cake down on your cake round or stand. I like to assemble my cakes on a lazy susan so that when I ice them it is easy to rotate the cake. Using a flat end spatula cover your layer with the dark chocolate cream cheese icing forming a layer about 1/2 inch thick.
- Cover with your next layer of chocolate cake and carefully pour a layer of the chocolate sauce over top. Be careful to keep it centralized in the center of the cake round because once you put the next two layers on top the sauce will be forced out to the sides.
- Place your next layer of yellow cake and cover with another 1/2 inch thick layer of the dark chocolate cream cheese icing.
- Top the last of the 4 layers off with your last cake round of chocolate cake.
- Start icing your crumb coat on the cake using a flat end spatula making sure to cover all the parts of the cake with a thin layer of icing. Place it in the fridge for 20-25 min. Finish coating the cake with about 1/2 inch thick layer of icing all the way around.
- Using a pastry bag fitted with a large tip like a #806 pipe small rounds all the way around the base of the cake, followed by 3 layers starting at the outside moving in on top of the cake. I then piped one large round in the center to place a flag which I wrote "Happy Birthday Stefan" on.


Big Ruffled Flower

Remember, Smokey the Dog from Tuesday? Well, this is the bridal cake that accompanied it. It was delivered to the Doubletree Chattanooga. It was our first trip there and I was surprised by how nice it was! The staff told me that the new owners had invested 27 Million to update it. You could really tell it too!
This is one of those cakes that is elegant because of its simplicity. Four tiers of buttercream bordered with a buttercream ruffle border.
The only fondant on the cake? The big ruffled flower on the top!
Well, that's it for this week - come back on Tuesday for more cake-a-dee goodness!!
Chocolate Cake with Peanut Butter Buttercream and Chocolate Peanut Butter Ganache


I was inspired by Coco Cake and decided to make a cake last week. I am all about using what I have in the cupboard these days and since I had made Nigella's Peanut butter chocolate fudge sauce the day before and had a good amount left over I thought I would use that as inspiration for my cake. I decided to make a regular chocolate cake, you can use which ever recipe you like best here. I used my classic go to chocolate cake that for now remains my secret. To make it special I made peanut butter buttercream, my mouth is watering just thinking about it. It was so creamy and light I could eat an entire bowl. I used the chocolate peanut butter sauce in between one layer and then I topped the cake with the last little bit, this makes it look and taste extra special. It is a nice way to elevate a simple cake from the normal cake and icing to cake, icing, and ganache!
One thing I like to do is make sure my cakes are nice and high, I always double my cake recipe and in this case I used 8" cake pans and made 3 layers. It makes the cake look professional and the more cake the better, right?
Peanut Butter Buttercream: (I am giving you the doubled recipe since you will need almost all of this for the filing and to ice the cake, feel free to half it if you make a smaller cake)
- 2 cups butter softened (you can do 2 sticks salted and 2 sticks unsalted)
- 8 cups powdered sugar
- 2 tsp vanilla extract
- 6 tablespoons of heavy whipping cream
- 1 cup of peanut butter
- Cream the butter until light and fluffy.
- Add in the sugar slowly until well combined. Add in the vanilla and cream.
- Beat in the peanut butter until creamy. That's it!


To assemble:
- Place the first layer of the cake on a clean plate that is easy to ice on. I like to put a cardboard cake round down on a lazy susan so that I can spin it as I ice. Take about 3/4 cup of your buttercream and spread it evenly on the layer.
- Put the next layer of cake on top of that and pour the cooled chocolate sauce on top, just enough to cover the top of the layer and not drip out over the sides. Top that with the last layer of cake.
- Take a flat icing spatula and start your crumb coat - this is just a thin layer of your butter cream icing to cover the entire cake. Don't worry about the crumbs. Once your cake is completely covered put it in the fridge for 30 min.
- Now you have a nice layer of cooled icing so when you put the rest of your buttercream on you won't get any crumbs. Ice an even layer of Buttercream over the entire cake.
- Take the rest of your icing and put it in a pastry bag fitted with a large round tip and pipe large balls around the bottom of the cake and three layers of round balls on the top. Starting on the outside and working in.
- All that is left now is to drop about a quarter of a cup of your chocolate sauce right on top, use a small flat end spatula to spread it evenly or if you use a lazy susan you can just spin it and it will flow out evenly on its own.

first 2 layers of the chocolate cake - buttercream on bottom layer, chocolate sauce on middle layer

Crumb coat ready for the fridge for 30 min.

using a round tip on a pastry bag pipe three layers of round circles on the top and 1 layer around the bottom of the cake

drop the chocolate sauce in the middle and spread evenly (spinning the lazy susan will help a ton)

Voila, Enjoy!
Whoopie Pies for Elvis


sugar and butter mixture - should be crumbly before adding cream, honey, and lemon juice


Assembly line
 Chocolate glaze

The Good, the Bad, and the Yummy states that "Elvis might have been horribly misguided about drugs and sequins, but he got one thing right—peanut butter and banana sandwiches.
I couldn't agree more. Elvis was a smart man with an even smarter mother. It is rumored that his mom used to prepare his favorite sandwich for him- a peanut butter and banana sandwich on hawaiian bread. My own father used to love to each peanut butter on ritz crackers, also very yummy and I love peanut butter and honey on wheat bread. How do you combine all three? Only in a whoopie pie of course!
My friend Taryn and I decided to tackle the idea of an Elvis whoopie pie. Banana Whoopie's with a layer of salted peanut butter spread and honey buttercream, to top it all off and really make it K Bakes style Taryn had the brilliant idea of dipping them in chocolate. It seems like a lot of hard work but they really weren't that difficult, and all the ingredients really make these amazing. By adding mashed bananas to the whoopie pies it makes for a ultra moist cake that isn't too sweet, once paired with the thick peanut butter spread and the light sweet honey buttercream you can't resist but to bite into these. I think even Elvis would be proud of the chocolate addition.
All recipes are adapted from the brilliant book "Whoopie Pies" by Sarah Billingsley and Amy Treadwell
Banana Whoopie:
- 1 cup all-purpose flour
- 1 cup whole weat flour
- 1 teaspoon baking soda
- 1/2 teaspoon salt
- 4 tablespoons unsalted butter at room temperature
- 4 tablespoons vegetable shortening
- 3/4 cup granulated sugar
- 1 teaspoon vanilla extract
- 2 large eggs
- 3 very ripe bananas, mashed
- Preheat oven to 350 degrees and line two baking sheets with parchment paper.
- Sift together using a strainer or a sifter both flours, baking soda, and salt into a bowl. Set aside
- In the work bowl of a stand mixer fitted with the paddle attachment (or a hand mixer if you don't have a stand mixer) beat together the butter, shortening, sugar, and vanilla until light and creamy. Add in the eggs and beat until combined.
- slowly add in the dry ingredients, once combined add in the mashed bananas and mix on medium speed for about 2 min.
- Using a spoon or a pastry bag with a large round tip drop about 1-2 tablespoons of batter depending on how large you want to make them onto the prepared baking sheets spacing them at least 2 inches apart. Bake on the sheets for about 10 min, or until the cakes begin to brown slightly. remove from the oven and let the cakes cool on the sheet for a few min before transferring them to a rack to cool completely.
Fillings!!
Honey Buttercream:
- 3 cups of confectioners sugar
- 1/2 cup (1 stick) unsalted butter, at room temperature
- 3 to 4 tablespoons of heavy whipping cream
- 2 tablespoons of honey (I use Savannah Bee Company's Winter White Honey)
- 1 teaspoon fresh lemon juice
- pinch of salt
In the work bowl of a stand mixer fitted with the paddle attachment, beat together the confectioners sugar and the butter, starting on low and increasing to medium speed, until the mixture is crumbly, about 1 minute. add the heavy cream, honey, lemon juice, and salt and beat on high speed until smooth, about 3 minutes.
Salty Peanut Butter:
- 3/4 cup of creamy or crunchy peanut butter (I used reduced fat creamy peanut butter at it was great)
- 3/4 cup unsalted butter, at room temperature
- 3/4 cup confectioners' sugar
- 1/2 tsp salt (if you don't want it to be too salty you could just do a pinch of salt)
In the work bowl fitted with the paddle attachment, beat together the peanut butter and butter on low speed until smooth and creamy. add the confectioners sugar and the salt and beat on low to incorporate. Increase the speed to medium and beat until the filling is light and fluffy, about 4 minutes.
Chocolate glaze:
- 1 1/2 cups semisweet chocolate chips
- 1 cup heavy whipping cream
- 1 tablespoon unsalted butter at room temperature
Put the chocolate in a heatproof bowl. Heat the cream in a small, heavy saucepan over medium heat just until it bubbles. Pour the hot cream over the chocolate in the bowl and stir until smooth. add the butter and stir to blend.
TO ASSEMBLE:
Put both your fillings into pastry bags fitted with a large round tip or in a ziplock back with the tip cut off. Pipe the peanut butter filling on half of the whoopie pie's and the honey buttercream on the other half. Assemble by putting the honey buttercream whoopies on top of the peanut butter ones (so the heavier side doesn't crush the buttercream) Once they are assembled dip each one into the warm chocolate glaze, then cool on a rack. Place a sheet of parchment or waxed paper under the rack to catch the drippings.
Blue Bow Wedding Cake

Not a lot of difficult cake techniques going on here, just buttercream with some piping and a bow made from gump- What?
Contest/giveaway what now??? Oh yeah, I remember now! You want to know who won that autographed copy of Cake Wrecks for voting for Icing Smiles.
Well, Chad took all the names of people that posted their comments on the Pepsi Refresh page and ran them through the Ran a Dee Mizer.
And the winner is.... Jennifer Murphy Tieman!!. Jennifer, please contact me with your address so I can ship your book out to you ASAP!
Thanks to all who voted and have a great weekend!!
Twigs and Blossoms

They wanted the flowers to match their wedding design and they also wanted their cake to have no borders.
The twigs and the flowers were easy peasy to make. We extruded the twigs using our clay gun and a couple of cutters and some gumpaste took care of the flowers.
The border, however, was probably the most time-intensive part of this cake. Now, I do "borderless" cakes all the time, but there is an art to it.
First of all, I make sure that the cake board is just big enough to fit the cake, maybe a smidge smaller. Then I stack the tiers as usual. I run a small (as small as possible) bead of icing right along crack where each tier meets and then get the cakes nice and cold. Once everything is cold and firm, use the heat from my finger to melt and smooth the buttercream as I turn the cake on the turner. Have you ever done any caulking? Like in a bathroom or kitchen? Well, if not, its good practice for doing cakes!
As always, thanks for stopping by and have an awesome week!!
Icing Smiles Update: Thanks to all our votes, Icing Smiles is now (as of this writing) ranked #25 in the Pepsi Refresh grant program!! They are moving up in the rankings everyday, but we need to vote every day to get them to that coveted top 10 position!! Vote here: http://www.refresheverything.com/icingsmiles
Banana Nut Cupcakes with Cinnamon + Honey Frosting


So since the recipe wasn't new I decided to use a new icing recipe. A few months ago I went to Savannah for a visit and I went to one of my favorite stores the Savannah Bee Company they carry a full line up of different flavored honey's and all are amazing. The store itself is a sight to be seen, they have a oversized honey comb where children can go and play, a full honey bar where you can taste each honey with a choice of local cheese, apples, and raw honey comb, or you can view a informative honey film while you shop. On my last trip I picked up some of their Winter White honey since I like sweets it was love at first sight. It is unlike any other honey I have ever tasted, it is creamy and has a hint of cinnamon in it. I knew right away it would be great in a dessert so I bought two of the 3 oz bottles (since I flew with a carry on, hah) and I was on my merry way.
So you can imagine how excited I was when I opened the cupboard and saw the honey staring me in the face. Rather then using regular honey as I had originally planned on and would have been delightful I am sure, I thought I could really make it spectacular by using the winter white honey! This frosting is now one of my new favorites, and I hope you guys enjoy it as well.
For the cupcakes see my Banana Nut Mini post here and follow the cupcake recipe, you can make this regular sized or mini - up to you.
For the icing you will need:
- 1 1/4 cup confectioners sugar
- 1/2 cup unsalted butter
- 1 tablespoon of honey - if you can get your hands on some of the Winter White Honey then use that here.
- 1/8 teaspoon of cinnamon
- 2 tablespoons of heavy whipping cream
In a mixer fixed with a whisk attachment beat sugar, butter, honey, and cinnamon for 3-4 minutes. Once creamed together add the heavy whipping cream. Voila all done! I doubled the recipe for the amount of cupcakes I was making which was about 24.
If you like you can throw a few tablespoons of butter into a saute pan and brown, add some cut up bananas and a half a teaspoon of cinnamon. Heat through place in a bowl set aside until they cool to room temperature. Place one slice on top of each cupcake.


Subscribe to:
Posts (Atom)