Showing posts with label crafts. Show all posts

My moms cookie cutters


Over the holidays I went back to Savannah to visit my mom and family. As most families do over the holidays - we baked. I had it in my head that I wanted to make Linzer Cookies, which are traditional Austrian cookies that I love. They're two cookies placed on top of each other with raspberry or strawberry jam in the center and a hole cut out of the top one dusted with confectioners sugar... so good. So in order to make these I needed some round cookie cutters and then smaller round cutters for the hole in the top cookie. I asked my mom where her cookie cutters were and I was happy to see that she had quite the collection. I am the youngest of 4 children and my mom was quite the baker when we were growing up (and still is) we have home video's of us decorating cookies at almost every holiday made with these very cookie cutters. Getting them all out brought back a lot of memories and I thought I would share her expansive collection with all of you.

  • Digg
  • Del.icio.us
  • StumbleUpon
  • Reddit
  • RSS

Twinkie Chan's cupcake scarves and cupcake coffee mug holder for sale on Etsy

Twinkie Chan's cupcake scarves are pretty legendary, especially the "Hostess" cupcake one. They are so fun and while they retail for $175, which I'm sure is out of many of our price ranges, they are still cool to look at. And you can make your own, using her book Twinkie Chan's Crochet Goodies for Fashion Foodies, which also has crochet tips for lots of other fun treats that'll be sure to have people stopping to ask you what you're wearing. Check out the Twinkie Chan Etsy shop and her website for more information, and sign up for her mailing list to get the latest food craft item news.


  • Digg
  • Del.icio.us
  • StumbleUpon
  • Reddit
  • RSS

100 Days of School


Its Sunday afternoon.  A mom is feeling really good about herself because she's actually making sure she has everything ready for school the night before.  She's going throught last week's notes, etc.  What's that?  100 days of school.  Bring a collection of 100 things uniquely displayed on Monday.


Mom goes searching through craft stuff.  There's that "H" that I haven't got around to doing anything with...what can we put on it?  Pom-poms? Too girly.  Beads?  Too girly.  Sequins?  Too girly.  (You can see where this is going?!?)  What else?


Manly copper (or copper-looking) pennies.
A hundred pennies will completely cover the front of the letter as well as a few left over to decorate the outside.  I actually kind of like the whole copper look. If you could find enough pennies of a person's birth year, it might be a neat little birthday gift, too.


Happy 100 Days of School!


Smiles!


Linking to:


  • Digg
  • Del.icio.us
  • StumbleUpon
  • Reddit
  • RSS

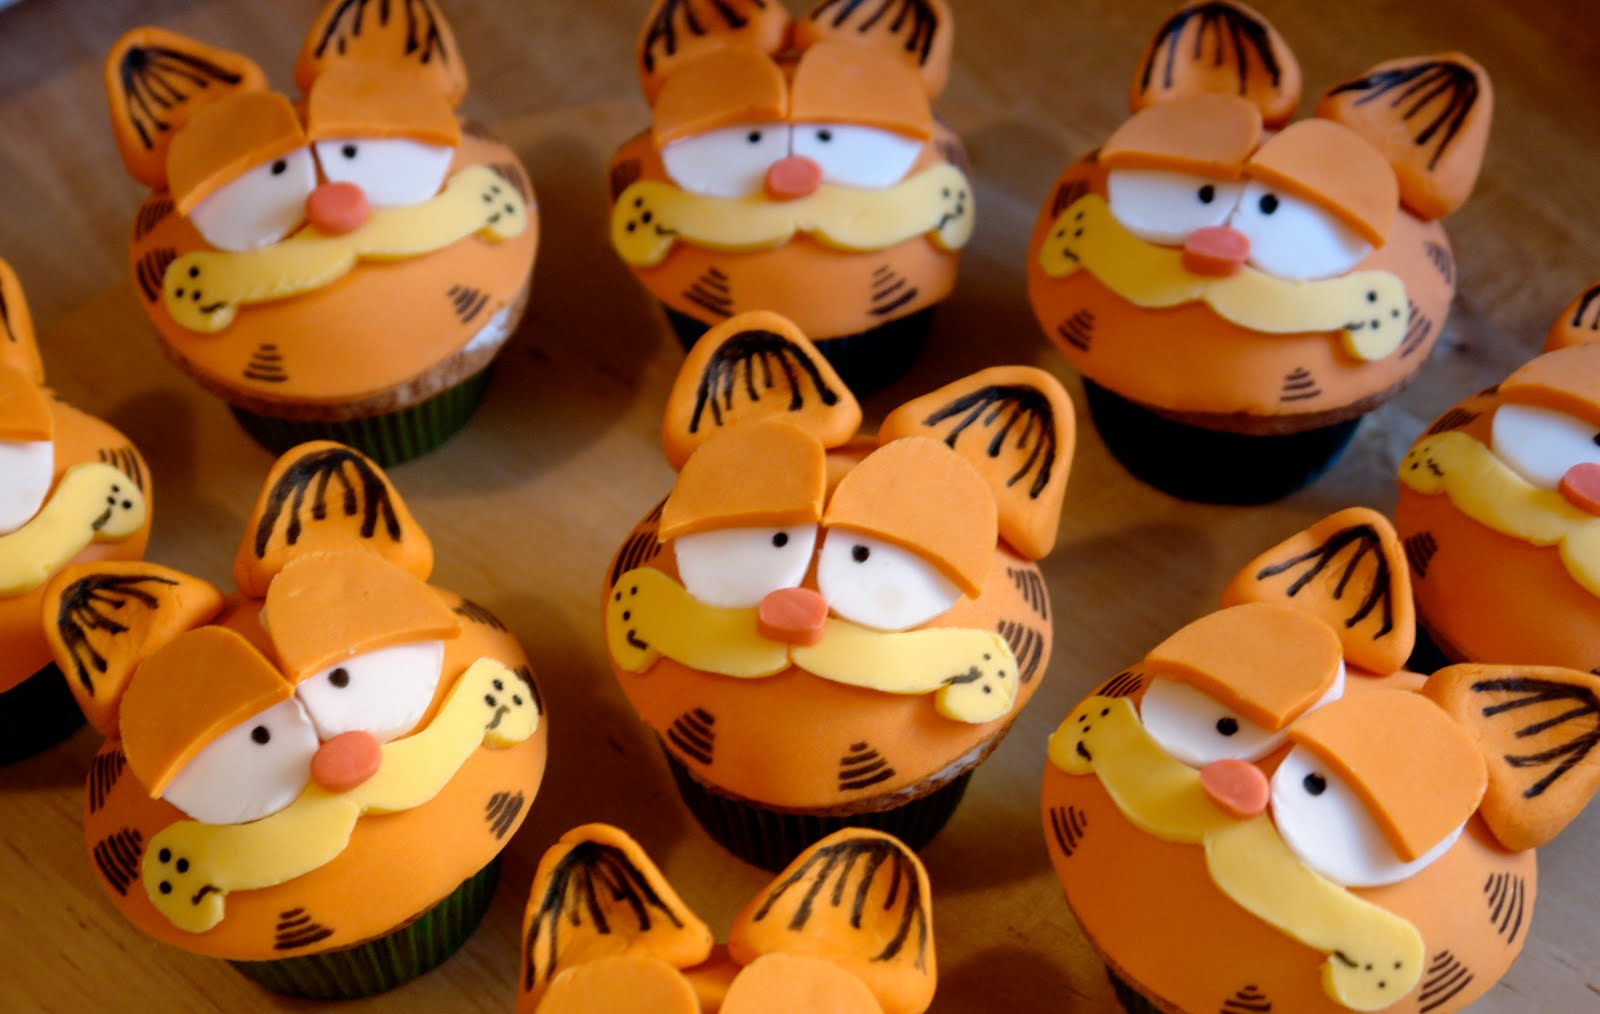
Garfield Cupcakes

Looking good Garfield

All the eyes, ears, and mouths before they went on the cupcake tops

before the faces went on

I felt like they were watching me!
Do you think they knew they were going to be eaten?

Long time no blog! I know I have been terrible. I hope that you all can forgive me, I have been traveling once again for work and with that and the holidays things just got away from me. The good news is that I have been baking I just haven't been blogging so we have lots to catch up on.

Starting today with Garfield cupcakes! I was asked to make these for a little boys birthday this weekend which I thought was so fun. The mom sent me some pictures of other Garfield cupcakes and I gravitated toward the version that Bakerella had created. The only issue is that the adorable faces are all made out of fondant... uh oh. I have a pretty strict policy about not making things just to look good but they also have to taste good and fondant goes against that policy in a big way. However, after much back and forth I realized I couldn't get the level of detail I wanted to achieve with anything other than fondant so I decided to give it a go. I also figured that these were for kids and kids tend to not be bothered by the sugary taste of fondant since kids love anything sweet. So I decided to go with it, I promised myself that the cupcake itself and the buttercream under the fondant would be amazing to make up for the use of the fondant on top.

This was my first time ever using fondant so lets just say I was a little nervous but honestly once you get used to working with the texture it really can be pretty fun.You might be wondering how I pulled this off. My answer would be with a lot of planning.

First I created a template on the computer in Illustrator (if you don't have illustrator you can always draw it out by hand) I made the pieces of his face how I thought they should be, so two oval eyes, two eye lids, and a cute curled up mouth. The ears and nose I created just with my eye. I then printed the paper out - cut each shape, and traced those on to a thicker piece of card stock. I then cut out the pieces of card stock and used them as stencils when I was cutting out my fondant. I know this sounds like a lot to do but it only takes a few min and is worth the time. This way each cupcake looked the same and I could breeze right through all the fondant cuts.

For the fondant I used plain white fondant that you can find at any craft store in the baking section or at a baking supply store. To get the colors right to match the true Garfield I recommend using Wilton's gel coloring so that you don't water down the fondant. The colors are also much more vibrant - here is a link to Wiltons color chart, very helpful.

Once I had all my pieces cut out I dabbed a little water on each piece to get them to stick to the fondant rounds on each cupcake. One thing I did learn is that fondant dries quickly! So you kinda have to work fast. I used edible ink pens for the eyes and details on the edge.

Now I feel confident enough to try and take on any fun character only next time I think I will dry my fondant round out for a few hours and place them on top of the decorated cupcakes so that people can easily remove them if they prefer not to eat the fondant. I hope Jim Davis would be proud.

  • Digg
  • Del.icio.us
  • StumbleUpon
  • Reddit
  • RSS

Harriot Grace


On any given day I probably look at about 500 websites, and at least that many emails pumped with stock shots from photographers. Since I am so over stimulated by imagery - good and bad, it's always fun when something really catches my eye.

A few months ago I came across Harriot Grace, a small humble online retailer out of Canada. I was originally drawn to them for their cake flags, but I quickly fell in love with everything else they had on their site. Not only do they have beautiful items but they have a great story. As the website states, it is a father daughter business, only this father and daughter live almost 3,000 miles apart from each other. It all started when the father started sending packages of handmade wooden spoons to his daughter which she fell in love with so she asked her father if he would like to share them with the world, after much thought he agreed and the rest is online history! Each item is lovingly handcrafted and one of a kind. They often sell out but replenish every few months. I hope you enjoy them as much as I do. Happy shopping.

  • Digg
  • Del.icio.us
  • StumbleUpon
  • Reddit
  • RSS

Tree Stand


I absolutely love this idea. A few years ago when I was buying my Christmas tree I noticed that they throw away all the ends of the trees when they make a fresh cut for the customer. First I noticed how amazing they smelled, better then any holiday candle you can buy... only that wears off after a few days. Second, I thought they would make a great holiday centerpiece on my kitchen table. I got some garland to go around the stumps at the Christmas tree farm and added some red berries from the craft store to make a easy and inexpensive centerpiece. Unfortunately that was before my blog days so I don't have any photos to share.

Good news is that during my recent blog surfing I came across this great idea from Once Wed, same thought process as my centerpiece but they have taken it to the next level. They call it a rustic wedding cake stand but I can see this being used in the spring time as well. Another blog that I love Design Sponge did a similar design for a wedding post they recently did. Whatever the reason I think this is a great way to showcase a simple desert or even a wedding cake.

What you will need:
  1. Cut piece of wood- can be round or oval it really doesn't matter as long as its big enough to hold your desert. You can get these at Michael's or any craft store
  2. Cut tree limb- make sure they are cut flat otherwise you desert will look like something out of Alice in Wonderland.
  3. Wood glue
Honestly- this is super easy, follow the images below and you will be on your way to not only a beautiful cake stand but a different one that no one else will have.

  • Digg
  • Del.icio.us
  • StumbleUpon
  • Reddit
  • RSS